
The first time I made a roux on a busy line, I learned two things fast: it looks harmless, and it will absolutely punish you if you walk away. A roux is just fat and flour cooked together, but that simple combo is the backbone of creamy mac and cheese, weeknight gravy, and the deep, toasty base of gumbo.
The good news is that roux is not fussy once you know what to watch for. In this guide, I will walk you through the fat-to-flour ratio, stirring and heat control, the color stages (with realistic timing), and exactly what each kind of roux is best used for.

What roux does
A roux has two main jobs:
- Thickening: Flour contains starch. When you cook the flour in fat, then later add liquid, those starches swell and thicken your sauce.
- Flavor: As the flour cooks longer, it browns and becomes nutty and toasted. More browning means deeper flavor, but slightly less thickening power.
That tradeoff is the key. White roux thickens the most. Dark roux tastes the boldest.
The basic ratio
For most home cooking, start with this rule:
Equal parts fat and flour by weight. If you are measuring with tablespoons and cups, equal parts by volume works well in practice for small batches, but it is an approximation (flour packs, and butter contains water).
- Small batch: 2 tablespoons fat + 2 tablespoons all-purpose flour
- Medium batch: 1/4 cup fat + 1/4 cup flour
- Larger batch: 1/2 cup fat + 1/2 cup flour
By weight is more accurate because flour can pack differently, but I am realistic. Measuring cups and tablespoons work well in a home kitchen.
Which fat should you use?
- Butter: Best for white and blond roux for classic béchamel, cheese sauce, and many gravies. It has great flavor but can brown quickly.
- Neutral oil (canola, vegetable, grapeseed): Great for longer cooked roux, especially peanut-butter and dark roux. More stable, less likely to burn.
- Animal fat (bacon drippings, chicken fat, beef drippings): Fantastic for savory gravies and stews. Just be aware the flavor will come through loud and clear.
If you want a dark roux, oil is your friend. Butter can work, but it browns faster because of its milk solids, which means less margin for error.
Tools that help
- Heavy-bottomed pan (stainless steel, enameled cast iron, or cast iron): Helps prevent hot spots.
- Whisk for smoothness early on, then a flat-edged wooden spoon or heatproof spatula to scrape corners.
- Liquid ready to go (warm is ideal): Milk, stock, or broth. Once roux hits the right color, you want to move.
One beginner note: cast iron is great for heat, but the dark surface can make it harder to judge color. When you are learning, a lighter pan (like stainless) makes the stages easier to see. Either way, trust your nose.
How to make roux
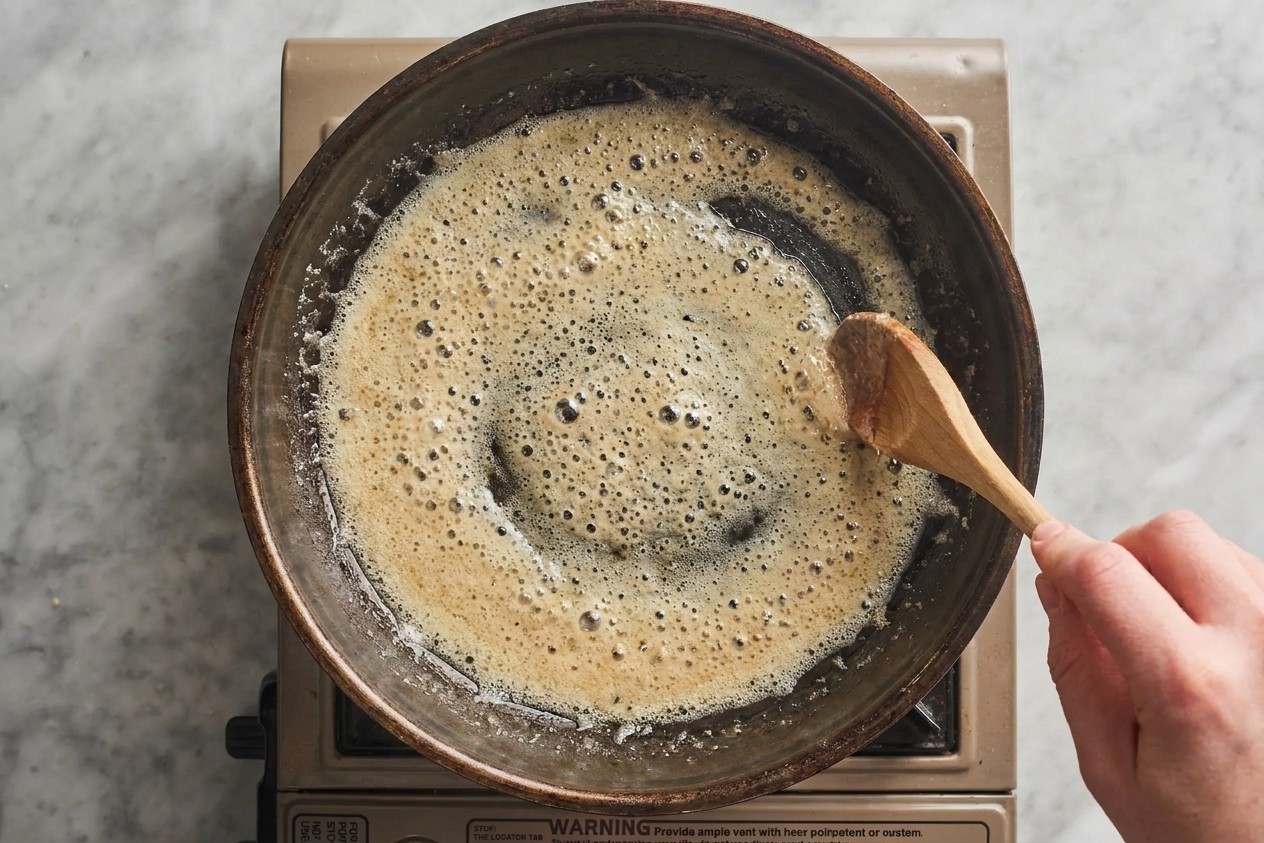
1) Heat the fat
Add your fat to the pan over medium heat. For butter, let it melt and stop foaming aggressively before you add flour. For oil, give it 30 to 60 seconds to warm up.
2) Add flour and whisk smooth
Sprinkle in the flour while whisking. The mixture should look like wet sand or a smooth paste, depending on your fat and heat level.
Fix if it looks greasy: Add a pinch more flour and whisk. You want a cohesive paste, not puddles of fat.
Fix if it looks dry and clumpy: Add a tiny bit more fat and whisk until smooth.
3) Cook and stir to the color you want
Once the flour is in, I recommend you drop to medium-low and stay there, especially if you are new to roux. Stir and scrape the bottom and corners. As it cooks, it will loosen up and become more fluid.
Important: if you add extra flour to adjust texture, cook it for another minute or two. You want the raw flour taste cooked out before you move on.
Roux stages
Timing varies based on pan, heat, and batch size. Use the color and smell as your real guide. You are looking for a steady progression from raw flour smell to toasted and nutty.
Batch size matters: larger batches hold heat and take longer to change color, plus they need more thorough stirring. The bigger the roux, the more you need to scrape the corners and keep it moving.
White roux
Look: Pale, creamy, barely any color change.
Smell: Raw flour smell fades, but it is not toasty yet.
Typical timing: 2 to 5 minutes on medium-low.
Best uses:
- Béchamel and cheese sauce (mac and cheese)
- Classic creamy soups
- Light gravies where you do not want browning
Goal: cook out the raw flour taste without taking on color. Think: clean and neutral, not toasted.
Blond roux
Look: Light golden, like pale sand.
Smell: Slightly nutty, like warm crackers.
Typical timing: 5 to 10 minutes on medium-low.
Best uses:
- Velouté style sauces (broth-based sauces)
- Turkey gravy and chicken gravy
- Many stew and pot pie fillings
Why it works: Great balance of thickening and flavor.
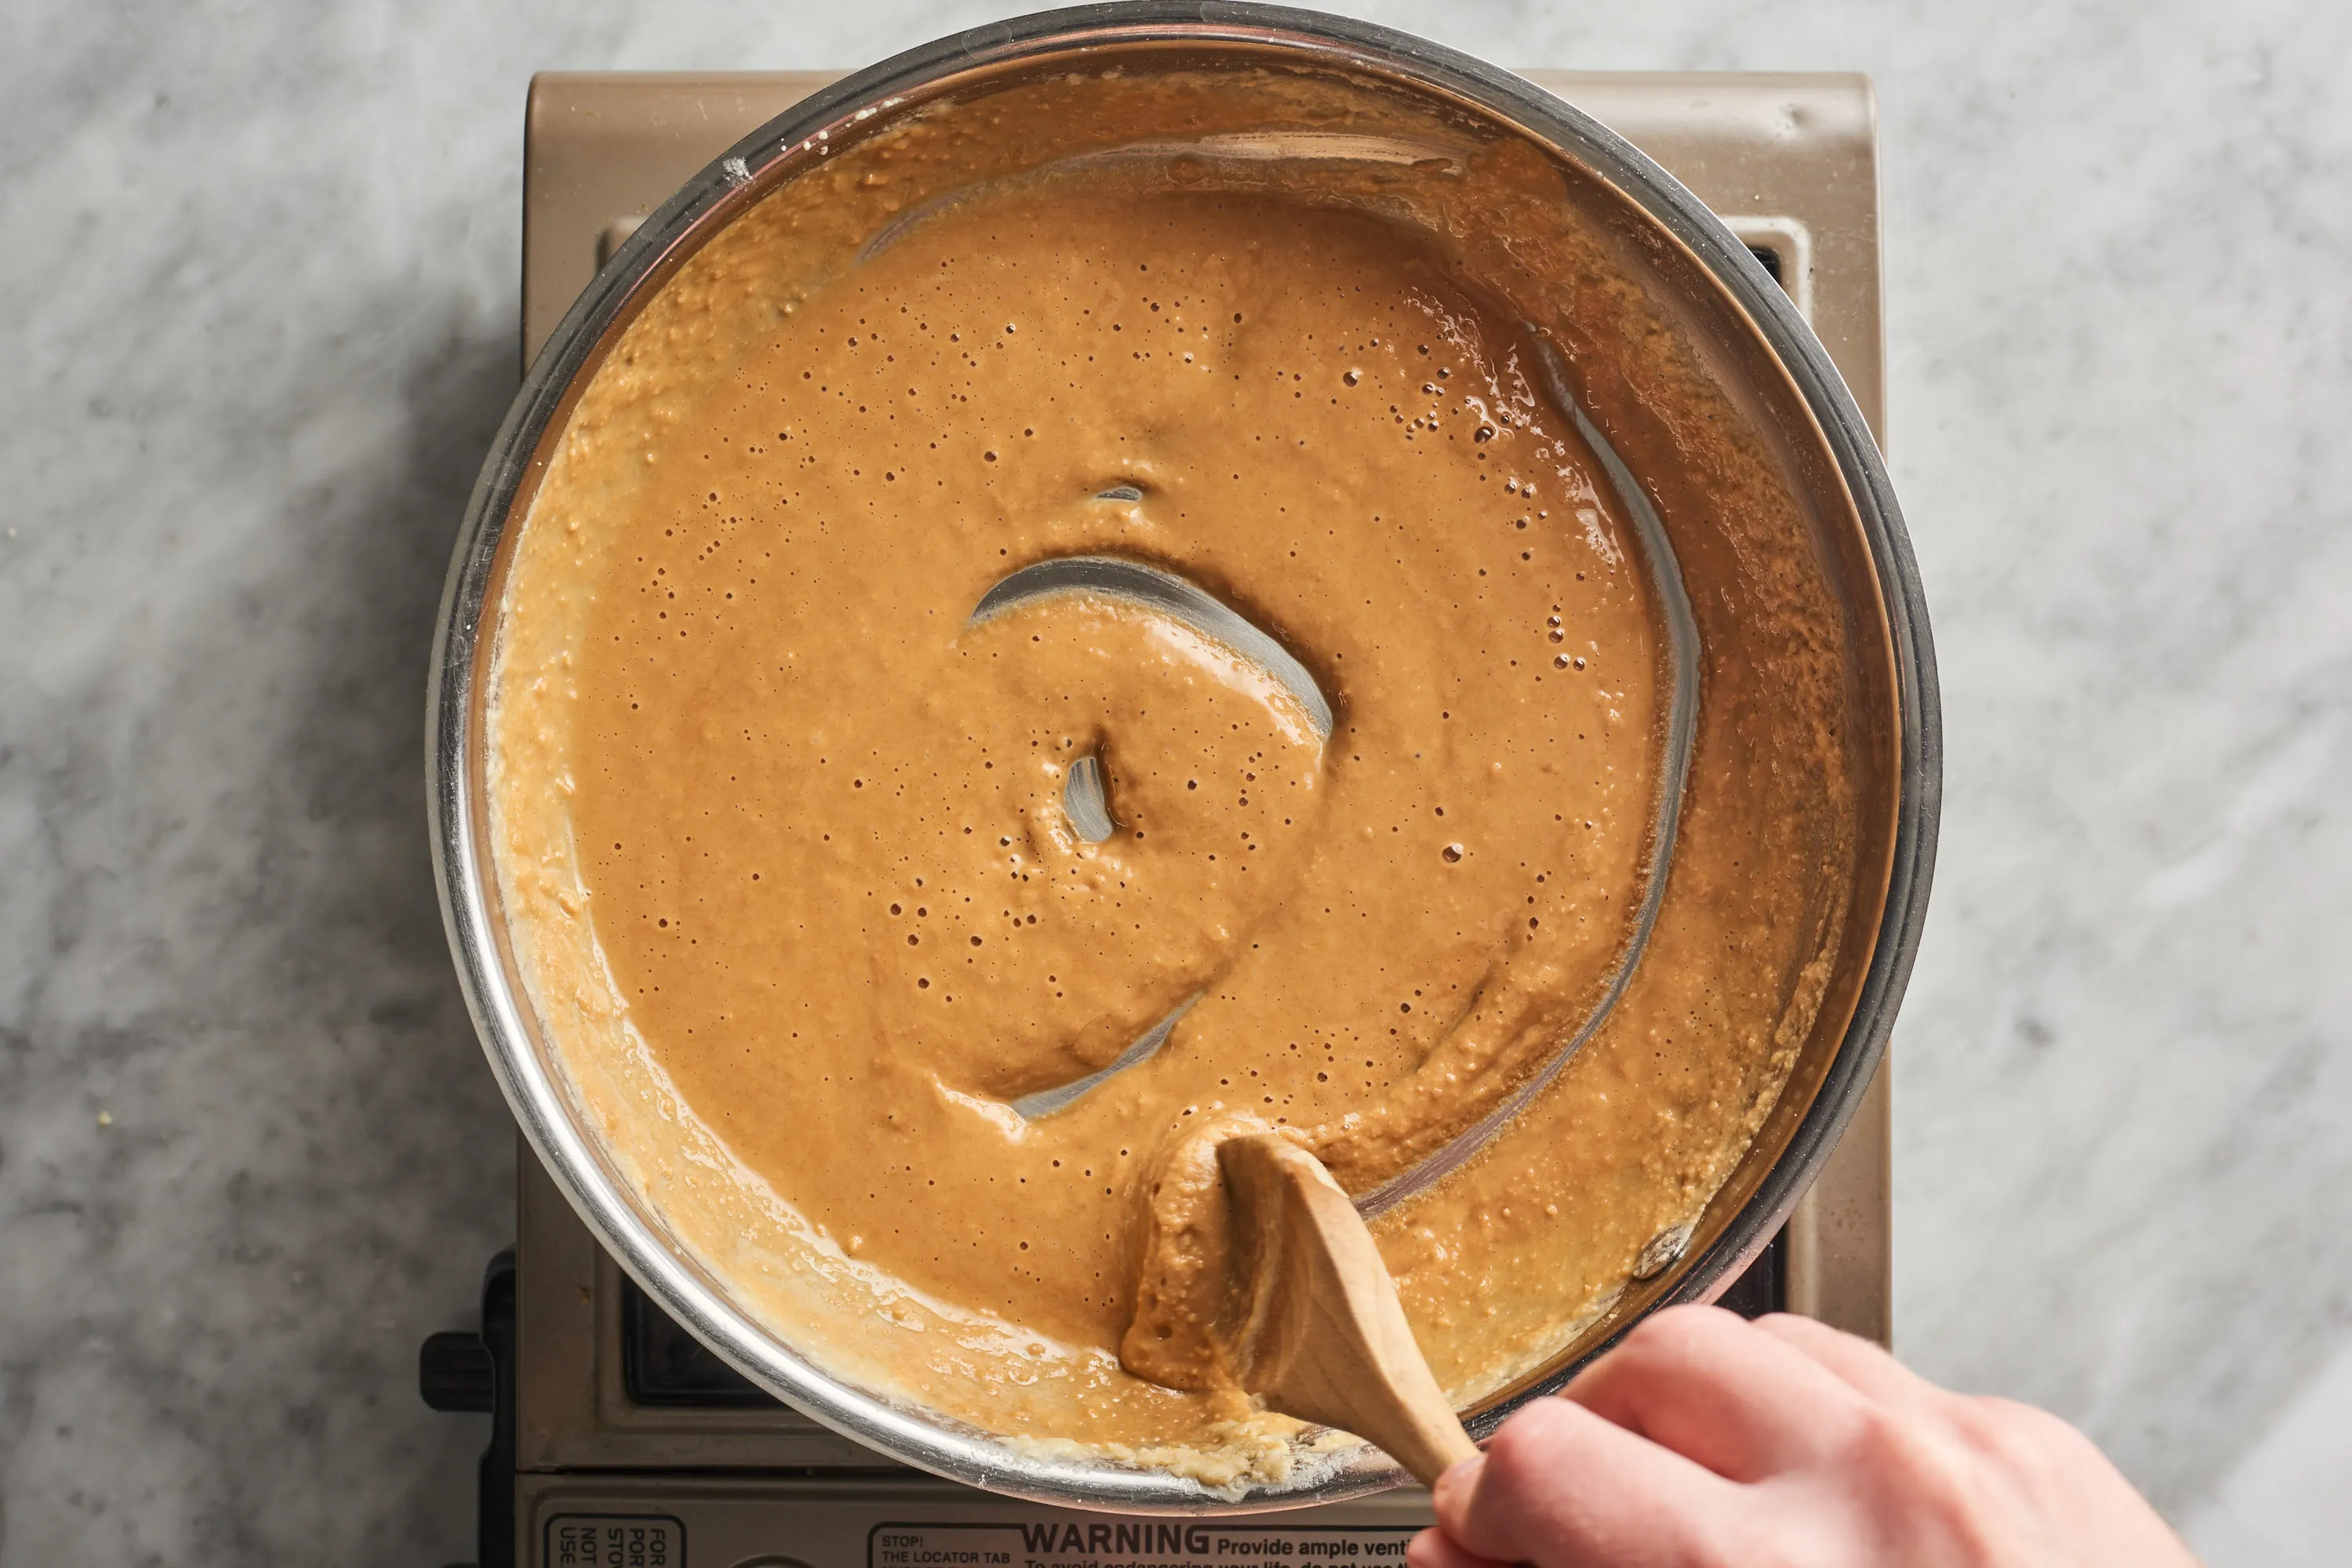
Peanut-butter roux
Look: Medium brown, the color of creamy peanut butter.
Smell: Clearly toasted and nutty.
Typical timing: 15 to 25 minutes on medium-low.
Best uses:
- Étouffée
- Heartier gravies
- Some gumbos, depending on the style you like
Why it works: Deep flavor, still offers noticeable thickening.
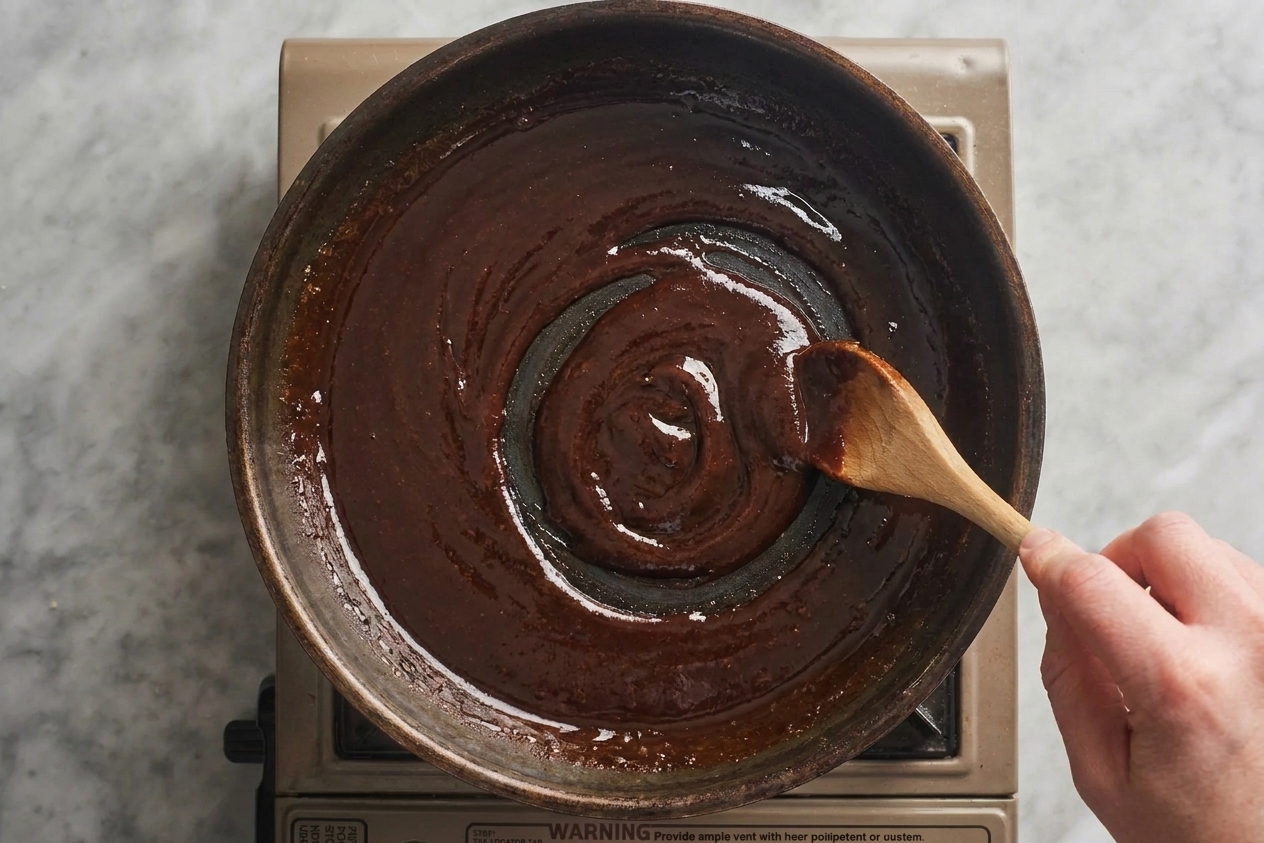
Dark roux
Look: Dark chocolate to deep mahogany.
Smell: Very toasted, almost coffee-like.
Typical timing: 25 to 45 minutes on medium-low (faster at higher heat, but the burn risk jumps).
Best uses:
- Gumbo, especially when you want that signature depth
- Some Cajun and Creole stews
Why it works: Massive flavor payoff, but less thickening. Dark roux is about taste first, body second.
How to avoid burning
- Do not crank the heat. Roux rewards patience. Medium-low is the safest zone.
- Stir constantly, especially as it darkens. A dark roux can go from perfect to burnt in under a minute.
- Use a pan you trust. Thin pans create hot spots that scorch flour.
- Scrape the corners. Burnt bits usually start where your spoon is not reaching.
- Stop earlier than you think. Roux continues to darken slightly from residual heat once you take it off the burner.
What burnt roux smells like: sharp, acrid, and unpleasant. If you smell that, do not try to save it. Toss it and start over. Burnt flour tastes bitter forever.
Add liquid without lumps
The lump fear is real, but you can make this nearly foolproof with two habits:
- Whisk while you pour. Do not dump all the liquid in at once.
- Add liquid gradually. Start with a splash to loosen the paste, then add the rest in a steady stream.
Temperature tip
You will hear rules like “hot roux, cold milk” or “cold roux, hot stock.” Temperature contrast can help reduce instant clumping, but in practice what matters most is gradual whisking.
If your liquid is warm (not boiling), you are in a great place. It speeds up thickening and keeps things smooth.
If you still get lumps
- Keep whisking over medium heat, many lumps dissolve as it heats.
- If needed, use an immersion blender or strain the sauce.
How much to use
This depends on how thick you want the final dish and how dark your roux is (darker thickens less). As a starting point for many sauces and gravies:
- For 1 cup liquid: 1 tablespoon fat + 1 tablespoon flour for a light to medium thickness
- For 4 cups liquid: 1/4 cup fat + 1/4 cup flour
For gumbo, the goal is often a rich body rather than a gravy-thick texture, and a dark roux is common, so you may use a generous amount for flavor and accept a looser finish.
Storing roux
Making roux ahead is one of my favorite “future me” gifts. It turns a weeknight sauce into a 10 minute job.
- Refrigerate: Cool, then store in an airtight container for about 1 week.
- Freeze: Spoon into a silicone ice cube tray, freeze, then transfer cubes to a freezer bag for a few months.
To use, melt it gently in a pan, then whisk in your liquid.
Troubleshooting
My roux looks separated and oily
It usually needs a touch more flour or a bit lower heat. Whisk in flour 1 teaspoon at a time until it looks cohesive, then cook for a minute or two so the new flour is not raw.
My roux got too dark, too fast
Your heat was too high or your pan runs hot. Pull it off the burner, keep stirring, and next time start at medium-low. If it tastes bitter, start over.
My sauce is not thickening
- You may not have used enough roux for the amount of liquid.
- Your roux may be very dark, which thickens less.
- Your sauce may need more simmer time. Many roux-thickened sauces tighten up after 5 to 10 minutes of gentle bubbling.
My sauce is too thick
Whisk in more liquid a splash at a time until it loosens.
Roux at a glance
- White: best thickening, mild flavor, 2 to 5 minutes
- Blond: balanced flavor and thickening, 5 to 10 minutes
- Peanut-butter: toasty and rich, 15 to 25 minutes
- Dark: deepest flavor, least thickening, 25 to 45 minutes
If you remember one thing: use medium-low heat, stir like you mean it, and trust your nose. Roux is more about attention than talent.
FAQ
Can I make roux with gluten-free flour?
You can, but results vary by blend. Many 1-to-1 gluten-free blends can work for a blond roux, but the thickening may be a bit different. Start with small batches and keep notes on what you like.
Is roux the same as a slurry?
No. A slurry is starch (often cornstarch) mixed with cold liquid and whisked into a hot mixture. A roux is flour cooked in fat first, which adds flavor and a different kind of body.
Do I have to stir constantly?
For white and blond roux, you can pause briefly, but do not wander off. For peanut-butter and dark roux, constant stirring is the safest approach.
What is the best roux for gumbo?
Many gumbos use a dark roux for that signature toasted depth. If you are newer to it or you prefer a slightly thicker gumbo, a peanut-butter roux is a wonderful middle ground.