
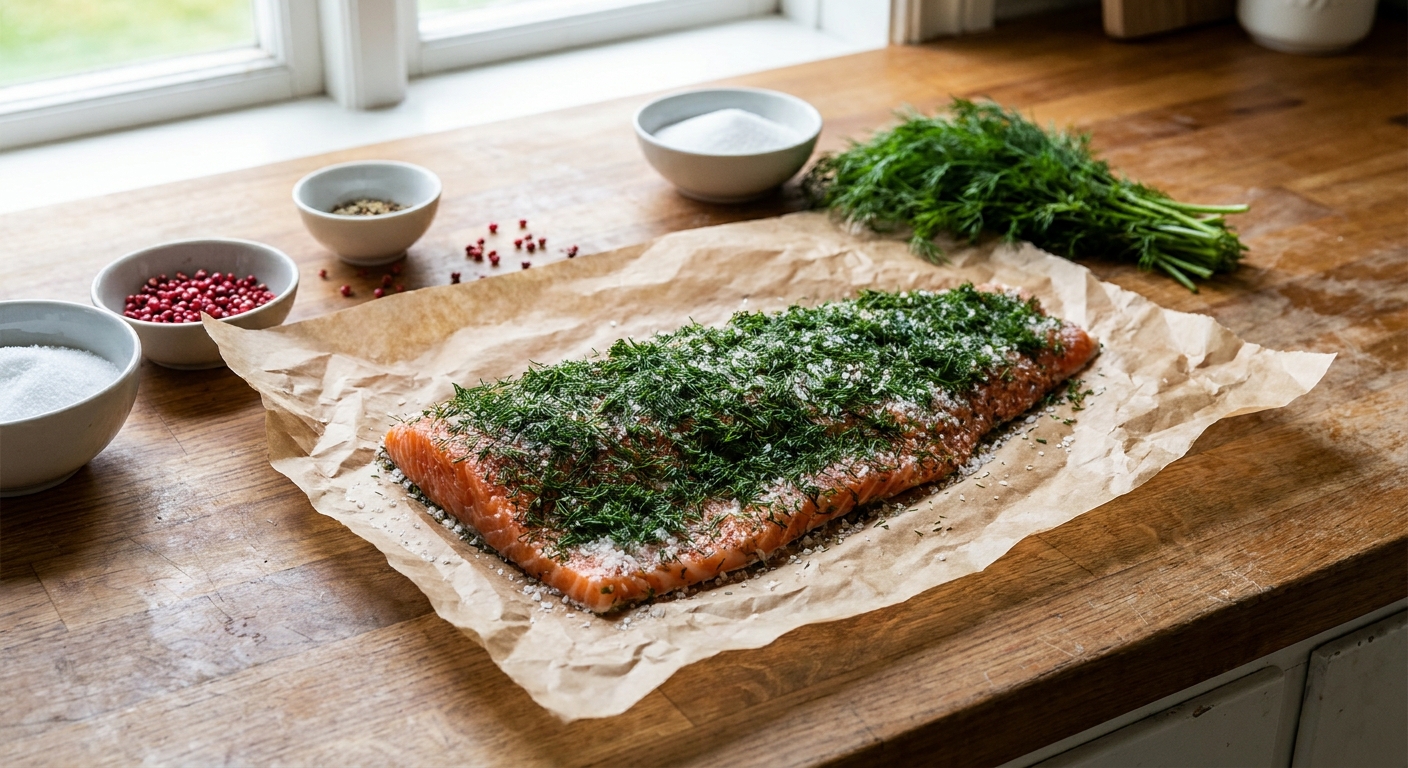
The first time I made gravlax at home, I kept waiting for the part where I had to do something complicated. A special pan. A smoker. A chef move I had not learned yet. But gravlax is wonderfully old-school and wonderfully simple: you coat salmon in a salt and sugar cure, cover it with dill, wrap it tight, and let the fridge do the work.
Over a day or two, the cure draws out moisture and gently seasons the fish most of the way through (exactly how far depends on thickness). The texture turns from raw and slippery to firm, silky, and sliceable, like the salmon on a great bagel board. And to be crystal clear, this fish is never cooked in a pan or oven. No heat involved, just curing.

This recipe keeps the cure ratio easy to remember, gives you a reliable timeline, and walks you through the rinse, dry, and slicing steps that make gravlax feel professional even on a busy weeknight.
A quick food safety note, since this is a no-heat recipe: start with very fresh salmon from a trusted source, keep it properly refrigerated (40 F or below), and follow your fishmonger’s guidance on what is suitable for curing. If you are serving anyone who is pregnant or immunocompromised, it is smart to be extra cautious and choose fish that has been handled appropriately for raw consumption.
What gravlax tastes like
Think clean, lightly sweet-salty salmon with a perfume of dill and a tender bite. The cure does not make it taste like a salt lick when the ratio is right and you rinse it at the end. Instead, it tastes balanced and bright, and it plays beautifully with lemon, mustard, capers, and anything creamy.
How long it takes
You will only spend about 15 minutes actively doing anything. The rest is fridge time while the salmon cures. In this method, a light weight helps press the cure into good contact and encourages a firmer, neater slice, but you are not trying to flatten the fish.
For a typical center-cut fillet, 36 to 48 hours is the sweet spot: firm enough to slice thin, not so cured that it feels stiff. Thicker pieces usually want closer to 48 hours, while thinner fillets can be ready at 24 to 36.
Once it is cured, keep it tightly wrapped and refrigerated, and plan to enjoy it over the next few days while the texture is at its best. If you need a place to start, think bagels, rye bread, or a simple plate with mustard-dill sauce and lemon.
Why this recipe works
- The cure ratio is predictable. Using a 2:1 ratio of sugar to kosher salt gives seasoning without turning the surface aggressively salty.
- Weighting speeds up the cure and improves texture. Pressing helps the cure stay in close contact with the salmon so it firms evenly.
- Turning the package keeps things uniform. Flipping once or twice redistributes cure and liquid so one side does not end up softer.
- A final rinse and thorough dry set you up for clean slices. Rinsing removes excess cure, and drying prevents a wet surface that tears when you slice.
Ingredient notes
Salmon
Buy the freshest salmon you can from a source you trust and tell the fishmonger you are curing it. Look for a thick, center-cut piece that is an even thickness so it cures evenly. Leave the skin on if possible because it makes slicing easier and helps the fish hold together.
Kosher salt
Use kosher salt, not fine table salt. Fine salt packs more densely and can over-salt the fish with the same volume. If you only have fine salt, reduce the amount by about one third.
Sugar
Plain white granulated sugar gives the cleanest flavor. Brown sugar works too and gives a slightly deeper sweetness.
Dill
Fresh dill is traditional and worth it here. Use lots. Stems are fine to include since you will rinse and scrape the surface later.
Optional aromatics
Cracked black pepper is classic. Citrus zest, a splash of aquavit, or a light scattering of coriander seeds are all lovely, but keep the base cure ratio the same.
Equipment you will need
- Cutting board and sharp knife
- Fish tweezers or clean pliers for pin bones
- Measuring cups or a kitchen scale
- Plastic wrap or parchment plus plastic wrap
- Rimmed baking sheet to catch liquid
- Second baking sheet or a flat plate to press the salmon
- One or two cans, a small skillet, or another clean weight
Pro tips
- Pin bones matter. Run your fingertips down the center line of the fillet and pull any pin bones with tweezers. It makes slicing and eating much nicer.
- Keep it cold, always. Cure in the coldest part of your fridge, ideally at 40 F or below.
- Press firmly but not brutally. You want steady contact, not a smashed fillet. A couple of cans is usually plenty.
- Flip the package. Turn it every 12 hours if you think of it. If you forget once, it will still be fine.
- Dry before slicing. After rinsing, pat very dry and let it sit uncovered in the fridge 30 to 60 minutes. A tacky, dry surface gives you cleaner, thinner slices.
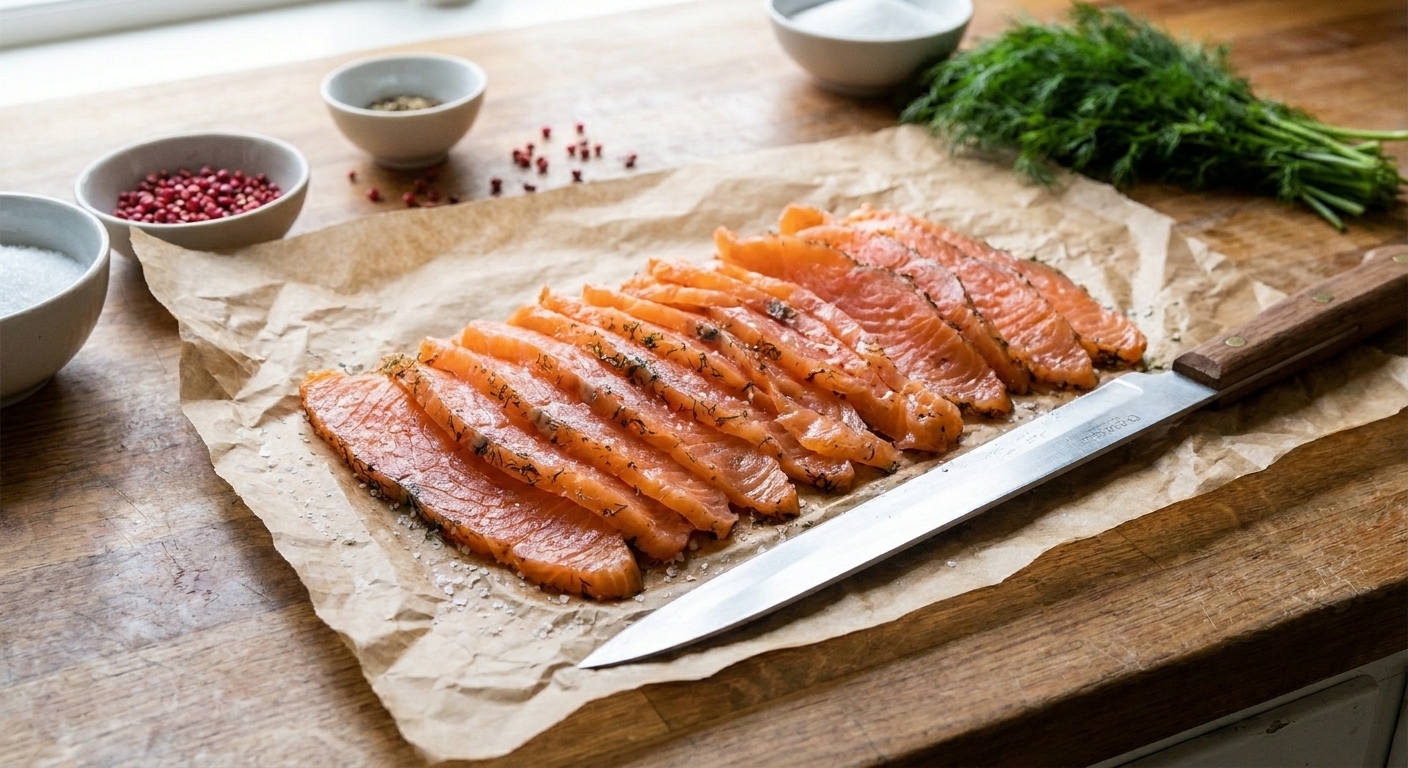
- Slice across the grain on a bias. Hold the knife nearly parallel to the board and use long strokes. Let the knife do the work.
Substitutes that work
- Brown sugar for white sugar: Swap 1:1 for a slightly more caramel-like flavor.
- Parsley plus a little fennel frond for dill: Not traditional, but it gets you some of that fresh, green lift.
- Fine salt for kosher salt: Use about 2 tablespoons fine salt for every 3 tablespoons kosher salt called for.
- Vodka for aquavit (optional): If you want a splash of spirit, vodka is neutral and easy to find. Keep it modest so the cure does not get overly wet.
Variations
Black pepper and lemon zest
Add 1 to 2 teaspoons finely grated lemon zest and 1 teaspoon freshly cracked black pepper to the cure.
Beet gravlax
Add 1 small grated raw beet to the cure for a dramatic color and earthy sweetness. Expect a slightly wetter cure.
Juniper and orange
Add 4 to 6 crushed juniper berries and 1 teaspoon orange zest for a more Scandinavian holiday feel.
Serving ideas
- On rye or pumpernickel with cream cheese or creme fraiche, thinly sliced cucumber, and lemon
- With mustard dill sauce, capers, and pickled red onion
- Folded into scrambled eggs right at the end, off the heat, so it stays silky
- On a potato platter: boiled baby potatoes, sour cream, chives, and gravlax
- As a brunch board with bagels, tomatoes, herbs, and sliced radishes
Storage and reheating
Store gravlax tightly wrapped in the refrigerator. For the best texture, keep it whole and slice as you go. It is at its peak for about 3 to 5 days after curing.
You can freeze gravlax. Wrap it very tightly, then place in a freezer bag. Thaw overnight in the fridge. The texture can be a touch softer after freezing, but it is still very good for bagels and spreads.
Reheating is not part of the plan here since gravlax is served cold. No pan, no oven.
Common mistakes
- Using table salt by volume. It can over-salt quickly. Stick to kosher salt or adjust.
- Curing an unevenly thick piece. Thin tail sections cure faster and can get too firm. A center-cut piece is the most forgiving.
- Not weighing it down. You can still cure without weight, but pressing improves contact and gives you a cleaner, firmer slice.
- Skipping the rinse. A quick rinse removes surface cure so the finished gravlax tastes balanced.
- Slicing straight down. Thin slicing is about angle and long strokes. A shallow angle across the grain gives you those delicate sheets.
- Leaving it warm on the counter. Keep it cold, and serve small portions at a time, returning the rest to the fridge.
FAQ
Is gravlax raw?
Gravlax is cured, not cooked. It is never cooked in a pan or oven. The salt and sugar cure changes the texture and seasons the fish, but it is still a no-heat preparation.
How do I know when it is done?
It should feel noticeably firmer and denser when you press the thickest part. The surface will look darker and slightly translucent. If it still feels very soft after 24 hours, keep curing and check again at 36 hours.
Do I have to flip it?
Flipping helps it cure evenly, especially if your weight is not perfectly balanced. If you forget once, do not panic. Flip when you remember.
Do I need “sushi-grade” salmon?
There is no regulated definition of sushi-grade in many places. What matters is buying very fresh fish from a trusted seller and keeping it cold. If you are unsure, ask your fishmonger what they recommend for curing.
Why is my gravlax too salty?
Most often it is from using fine salt by volume, curing much longer than planned, or skipping the rinse. You can try soaking slices briefly in cold water, then patting dry, but prevention is easier.
The recipe
Gravlax
Salt and sugar cured salmon with lots of dill, pressed in the fridge until firm and sliceable. Rinse, dry, then slice paper thin. This is a no-heat cure, never cooked in a pan or oven.
- Prep
- 15 minutes
- Cook
- 0 minutes
- Total
- 36 to 48 hours
- Yield
- 12 servings (about 2 pounds salmon)
Ingredients
- 1 (2 lb) center-cut salmon fillet, skin on if possible, pin bones removed
- 1/2 cup granulated sugar
- 1/4 cup kosher salt
- 1 large bunch fresh dill (about 2 to 3 oz), roughly chopped, plus a few whole sprigs if you like
- 1 tsp freshly cracked black pepper (optional)
- 1 tsp finely grated lemon zest (optional)
Instructions
- Prep the salmon. Pat the salmon very dry with paper towels. Run your fingertips along the center of the fillet and remove any pin bones with tweezers. Set the salmon skin-side down on a sheet of plastic wrap placed on a rimmed baking sheet.
- Mix the cure. In a small bowl, mix the sugar and kosher salt. If using, stir in the black pepper and lemon zest.
- Cure and wrap. Sprinkle the cure evenly over the flesh side of the salmon, pressing lightly so it adheres. Pile the chopped dill on top, covering the surface generously. Wrap the salmon tightly in plastic wrap, keeping the dill and cure snug against the fish. Wrap a second time if needed to prevent leaks.
- Weight and refrigerate. Place a second baking sheet or a flat plate on top of the wrapped salmon, then add a steady weight (like 1 to 2 cans). Refrigerate 36 to 48 hours. Flip the package every 12 hours if you remember.
- Unwrap, rinse, and dry. Remove the salmon from the wrap and scrape off the dill and cure. Rinse the surface briefly under cold running water to remove excess salt and sugar. Pat very dry with paper towels, then refrigerate uncovered for 30 to 60 minutes to dry the surface further.
- Slice thin. Place the gravlax on a cutting board. Using a long, sharp knife, slice very thin pieces on a slight bias, cutting across the grain. Keep the knife at a shallow angle and use long, smooth strokes. If the skin is on, slice down to the skin and lift the slices away, leaving the skin behind.
- Serve cold. Serve immediately or wrap tightly and refrigerate, slicing as needed.
Notes
Cure ratio: This recipe uses a 2:1 ratio of sugar to kosher salt by volume (1/2 cup sugar to 1/4 cup kosher salt), which is a reliable, balanced cure for home gravlax.
Timing guidance: For a typical 2 lb center-cut fillet, 36 to 48 hours gives a firm, sliceable texture. Thinner pieces may be ready closer to 24 to 36 hours.
Food safety note: Gravlax is cured, not heat-cooked. Use very fresh salmon from a trusted source and keep it well-chilled throughout the process.