
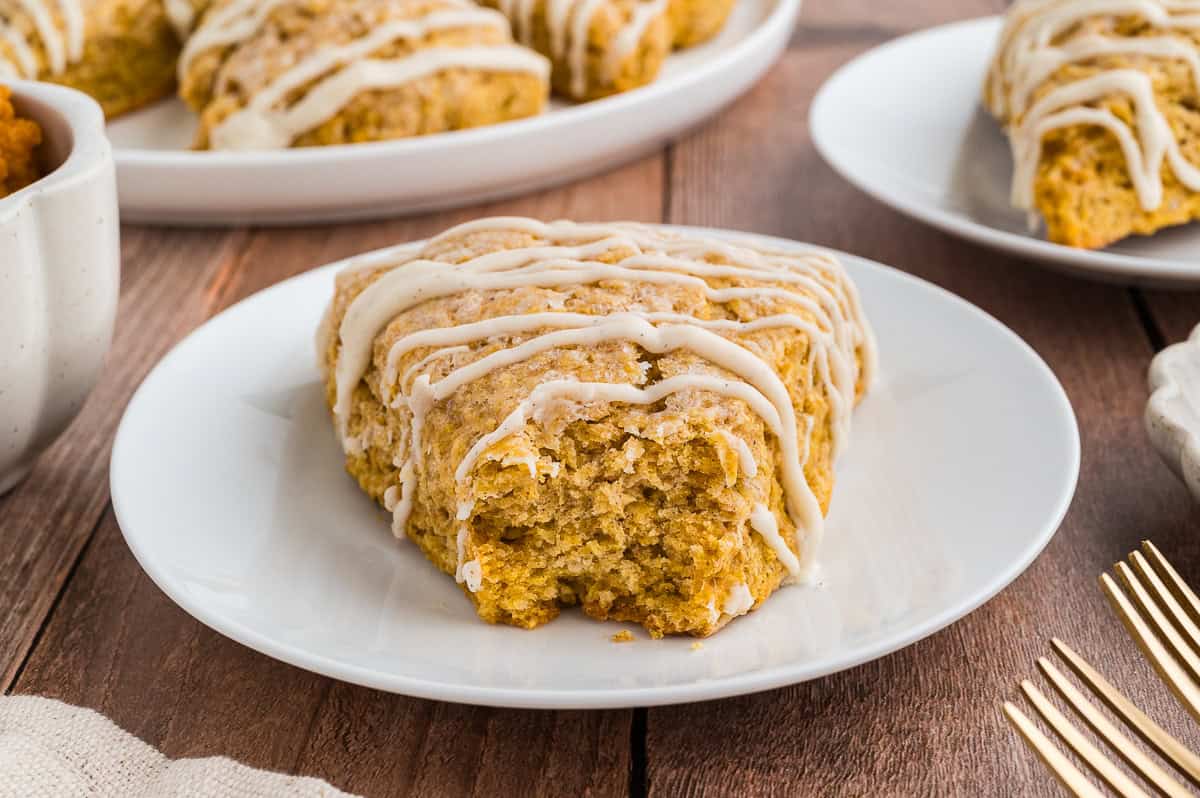
The first time I made pumpkin scones at home, I treated them like pumpkin muffins: I mixed until the batter looked perfectly smooth, then wondered why the scones baked up soft but strangely bready and tight. Scones are a different world. They want cold butter that stays in small pieces, a shaggy dough, and just enough mixing to pull everything together.
This version is the one I keep coming back to when the weather turns and my five-year-old starts asking for “the cozy breakfast.” You get that warm pumpkin-spice aroma, but the texture stays unmistakably scone: tender, flaky, and a little crumbly in the best way.

If you have ever wrestled with dry flour patches, a dough that feels sticky one minute and dusty the next, you are in the right place.
Or maybe you have dealt with the classic problem: scones that look done on top but feel underbaked in the center.
I will walk you through the cues I use: what the dough should look like before you shape it, how firm the edges should feel when they are baked, and why pea-size pieces of butter are a good sign, not a mistake.
What to expect
- Flaky crumb from cold butter worked into the flour, not a stirred batter.
- Balanced pumpkin flavor that does not turn the scone cakey or gummy.
- Light glaze that adds sweetness without drowning the texture.
- Clear doneness cues so you do not have to guess based on loaf or muffin timing.
Key cues
What the dough should look like
After you stir the wet into the dry, the dough should look shaggy, like it is one gentle nudge away from coming together. You should still see small butter bits and maybe a few floury streaks. That is normal. If it looks like a smooth batter, it is already headed toward muffin territory.
If you see dry flour sitting at the bottom of the bowl, do not muscle it into submission. Sprinkle in cream or milk 1 to 2 teaspoons at a time and toss with a fork until the dry spots hydrate. The goal is “gathers into a dough,” not “perfectly uniform.”
If the dough turns sticky
Pumpkin puree can vary a lot, so some days the dough feels stickier than you expect. Before you add more flour, try the gentle fixes first: lightly flour your hands and the counter, then use a few light folds to bring it together. If it still will not hold its shape, dust on a little flour and stop as soon as it becomes workable. Too much extra flour is where “dusty” happens.
What you want to see from the butter
Those pea-size pieces are not a mistake. They help create little pockets as they melt, which encourages flaky layers and a lighter crumb. It is not the only thing that makes a scone rise, but it is a big part of why a scone feels like a scone. I look for a mix of sandy crumbs and a few clearly visible nuggets, not one even, fine texture.
Shaping and thickness
When you pat the dough out, aim for an even thickness all the way across. That single detail fixes a lot of scone problems, including underbaked centers and overbrowned edges. I keep it about 1 inch thick, and I resist the urge to press hard. Pat, tidy the edges, and stop.
Chilling to prevent spreading
If your kitchen is warm, or your butter started softening while you were mixing, chilling is your best friend. I chill after cutting, with the wedges already on the baking sheet, so they go into the oven cold and hold their shape. You are looking for dough that feels firm again to the touch.
How to tell when they are done
Pumpkin can make the dough darker, so top color is not always the best clue. Instead, I check three things: the tops look matte and set (not glossy), the edges feel firm when you gently tap them, and the bottoms are evenly browned. If the tops look set but the bottoms are pale, they probably need another minute or two.
When to glaze
Let the scones cool until they are warm, not hot. Too hot and the glaze melts right in and disappears. Warm is the sweet spot where it drizzles easily, sets into a light sheen, and still clings to the top.
Why this recipe works
- Cold butter creates layers. Cutting cold butter into flour leaves small pieces that melt in the oven, helping create pockets for flake and lift.
- Minimal mixing keeps them tender. Scones are happiest when mixed just until no big dry pockets remain. Overworking turns them bread-like.
- Chilling the shaped dough helps. A short chill firms the butter so the scones rise higher and spread less.
- A thin glaze finishes, not floods. A light drizzle adds sweetness and shine while keeping the crumb crisp at the edges.
Ingredient notes
Pumpkin puree
Use canned pumpkin puree, not pumpkin pie filling. Pumpkin varies in water content, so if your puree looks very loose or watery, blot a few spoonfuls on paper towels for a minute before measuring. If you already measured and the dough feels sticky fast, use the lower end of the cream or milk range and add more only if you need it.
Butter
Keep it cold. If your kitchen is warm, cube the butter and pop it in the freezer for 10 minutes before cutting it in. You want pieces ranging from sandy bits to pea-size nuggets so you get flaky layers without greasy pockets.
Flour
All-purpose flour is perfect here. If you tend to scoop flour straight from the bag, try spooning it into your measuring cup and leveling it off to avoid packing in too much.
Leavening
Make sure your baking powder is fresh. If your scones never rise, stale baking powder is often the culprit.
Spices
Cinnamon plus pumpkin pie spice gives a rounded flavor. If you only have one or the other, you can still make delicious scones.
Dairy
Heavy cream makes the richest, most tender scone, but whole milk works with a slightly lighter crumb.
Glaze
Powdered sugar makes a smooth glaze. Start thick, then thin with a few drops of milk or cream until it drizzles easily.
Equipment you will need
- Large mixing bowl
- Pastry blender or two forks (or clean fingertips for rubbing in butter)
- Measuring cups and spoons
- Baking sheet
- Parchment paper or a silicone baking mat
- Bench scraper or knife for cutting wedges
- Cooling rack
Pro tips
- Stop mixing earlier than you think. Once the dough looks mostly combined, turn it out and use gentle folds to finish bringing it together.
- Fix dry flour patches the gentle way. Sprinkle 1 to 2 teaspoons of cold cream or milk over the driest spots and toss with a fork. Repeat only as needed.
- Keep butter pieces small and cold. Aim for pea-size bits, not large chunks, so you get flaky layers without buttery holes.
- Use a light touch when shaping. Pat, do not press hard. Compressing the dough can flatten layers.
- Chill before baking. Even 15 minutes in the fridge helps the butter stay cold, reduces spread, and encourages a taller bake with a more even center.
- Glaze when barely warm. If the scones are hot, the glaze can melt and disappear. If they are fully cold, it can set too thick.
Substitutes that work
- No heavy cream: Use half-and-half or whole milk. Expect slightly less richness.
- No pumpkin pie spice: Use cinnamon plus a pinch of nutmeg and ginger if you have them.
- Brown sugar instead of granulated: Works nicely for a deeper, caramel note. Keep it packed when measuring.
- Butter alternative: For true flaky scones, butter is best. Plant-based butter can work, but choose a stick style, not a tub spread, and keep it very cold.
- Glaze alternative: Skip the glaze and finish with a light sprinkle of coarse sugar before baking.
Variations
- Maple glaze: Swap some of the milk in the glaze for maple syrup for a warm, breakfast-y finish.
- Chocolate chip pumpkin scones: Fold in mini chocolate chips right at the end, using a few gentle turns.
- Pecan pumpkin scones: Add chopped toasted pecans for crunch and a nutty contrast.
- Extra spice: Add a pinch of black pepper or cardamom for a little bakery edge.
Serving ideas
- With coffee or chai for an easy fall breakfast
- Split and spread with salted butter or cream cheese
- Alongside scrambled eggs and fruit for a weekend brunch plate
- As an afternoon snack with a mug of hot cocoa
Storage and reheating
Room temperature
Store cooled scones in an airtight container for up to 2 days. If they are glazed, place parchment between layers to prevent sticking.
Reheating
Warm in a 300°F oven until just heated through. This brings back the crisp edges better than the microwave.
Freezing
Freeze unglazed scones in a single layer until firm, then transfer to a freezer bag. Thaw at room temperature and refresh in a low oven. Glaze after reheating for the cleanest finish.
Common mistakes
Dry flour patches that never disappear
This usually means the dough needs a tiny bit more liquid, not more mixing. Add cold cream or milk a teaspoon at a time and toss gently to distribute.
Tough, bready scones
Overworked dough is the big one. Once the liquid hits the flour, gluten starts forming. Mix just until the dough can be gathered, then stop.
Dense scones that do not rise
Check your baking powder freshness and make sure the butter stayed cold. Warm butter can soak into the flour and reduce lift.
Gummy centers
Pumpkin adds moisture, and pumpkin scone dough can look done before it is set inside. Use bottom browning and edge firmness as your cues, and cool on a rack so steam does not get trapped.
Dry, crumbly scones
Too much flour or too long in the oven can do it. Measure flour lightly and pull the scones when the tops are matte and the edges feel set.
FAQ
Can I make pumpkin scones ahead of time?
Yes. Shape and cut the scones, then refrigerate on the baking sheet (covered) for several hours. Bake straight from the fridge. You may need an extra minute or two.
Why is my dough so sticky?
Pumpkin moisture varies. Lightly flour your hands and work surface, and use gentle folds. If it is truly wet and cannot hold shape, sprinkle on a little flour a tablespoon at a time, using as little as possible.
Should I use a food processor?
You can, but it is easy to over-process and warm the butter. If you do use one, pulse briefly and stop while you still have visible butter pieces.
How thick should I pat the dough?
A thicker disk gives taller scones, but you want an even thickness so the centers bake through. If you go too thin, they bake up more like cookies. Aim for a sturdy, even 1 inch thickness so the cutter leaves clean edges.
Do I have to glaze them?
No. The scones are flavorful on their own. The glaze just adds a sweet finish and that bakery look. For the cleanest set, drizzle it on when the scones are warm, not hot, so it does not melt right in.
The recipe
Pumpkin Scones
Tender, flaky pumpkin scones made with cold butter and a rubbed-in crumb, baked until set and finished with a light vanilla glaze.
- Prep
- 20 minutes
- Cook
- 16 to 20 minutes
- Total
- 55 minutes
- Yield
- 8 scones
Ingredients
- 2 cups (240 g) all-purpose flour, plus more for the counter
- 1/3 cup (65 g) granulated sugar
- 1 tbsp baking powder
- 1/2 tsp fine salt
- 1 1/2 tsp ground cinnamon
- 1 tsp pumpkin pie spice
- 1/2 cup (113 g) unsalted butter, very cold, cut into small cubes
- 1/2 cup (120 g) pumpkin puree
- 1 large egg, cold if possible
- 1 tsp vanilla extract
- 3 to 5 tbsp (45 to 75 ml) heavy cream or whole milk, plus 1 tbsp for brushing
- For the light glaze
- 3/4 cup (90 g) powdered sugar, sifted if lumpy
- 1/2 tsp vanilla extract
- 1 to 2 tbsp (15 to 30 ml) milk or cream, as needed
- Pinch of salt
Instructions
- Prep. Line a baking sheet with parchment. Preheat the oven to 400°F (205°C).
- Mix dry ingredients. In a large bowl, whisk together the flour, sugar, baking powder, salt, cinnamon, and pumpkin pie spice.
- Cut in the butter. Add the cold butter cubes. Use a pastry blender (or two forks) to cut the butter into the flour until you have a mix of sandy crumbs plus some pea-size pieces.
- Mix wet ingredients. In a small bowl, whisk together the pumpkin puree, egg, vanilla, and 3 tablespoons of the cream or milk.
- Combine gently. Pour the wet mixture into the dry. Use a fork to toss and stir just until a shaggy dough forms. If you still have dry flour at the bottom, drizzle in more cream or milk 1 teaspoon at a time, tossing gently, until the dough can be gathered. Do not mix until smooth.
- Shape. Turn the dough onto a lightly floured counter. Pat into a disk about 1 inch thick. If the dough cracks at the edges, press it together lightly. If it sticks, dust with a little flour.
- Cut. Use a bench scraper or knife to cut into 8 wedges. Transfer wedges to the prepared baking sheet, leaving space between them.
- Chill briefly. Refrigerate the tray for 15 minutes (or freeze for 8 to 10 minutes) to firm up the butter.
- Brush. Brush the tops lightly with the remaining 1 tablespoon cream or milk.
- Bake. Bake for 16 to 20 minutes, until the tops look matte and set, the edges feel firm, and the bottoms are evenly browned. Cool on the baking sheet for 5 minutes, then transfer to a rack to cool slightly.
- Glaze. In a small bowl, whisk powdered sugar, vanilla, pinch of salt, and 1 tablespoon milk or cream until smooth. Add more liquid a few drops at a time until it drizzles easily from a spoon.
- Finish. Drizzle glaze over warm (not hot) scones. Let the glaze set for 10 to 15 minutes before serving.
Notes
Dry flour patches: Add liquid slowly, 1 teaspoon at a time, and toss with a fork. Mixing harder usually makes scones tough.
Do not chase a smooth dough: A few floury streaks and visible butter pieces are normal before shaping.
Doneness cue: Pumpkin darkens the scone dough, so rely on a set, firm edge and a browned bottom more than top color.