
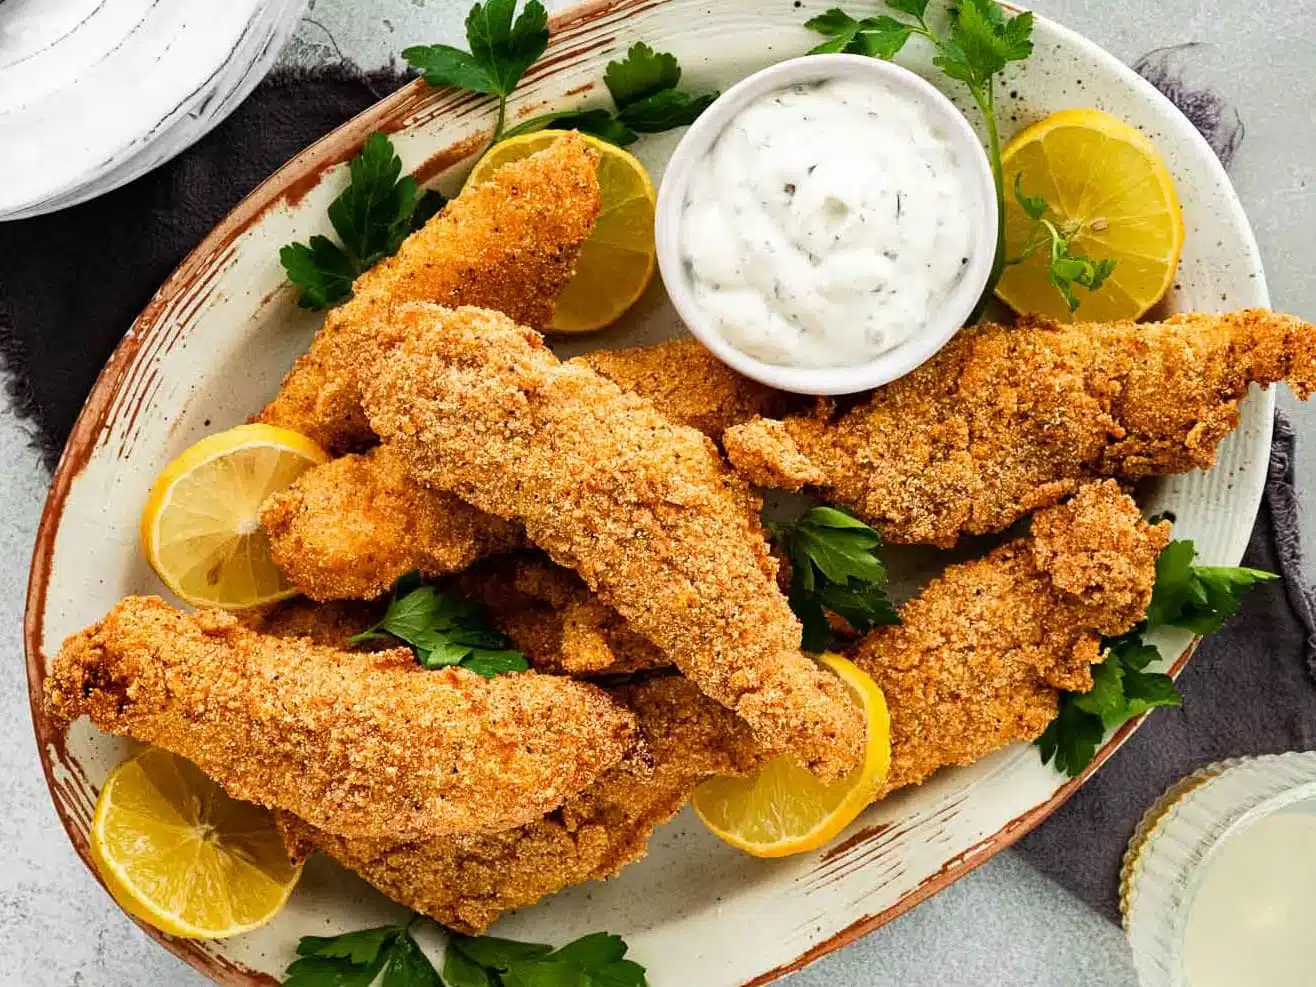
Fish sticks have a funny reputation, like they’re only something you buy frozen and forget about until the box is empty. But making them at home is one of those small cooking wins that feels surprisingly big. You get real pieces of white fish that flake when you bite into them, not the minced-and-formed style you get in some store-bought versions. You also get to decide exactly how crunchy the coating is and how boldly you season it.
My former bakery-manager brain loves this recipe because it is all about process. A tidy breading station, consistent stick size, and one simple rule: keep things dry so the crumbs stay crisp. Pat the fish dry, and park the breaded sticks on a rack instead of letting them sit in a damp pile. Once you do it once, it becomes a repeatable weeknight rhythm.

Two ways to cook
Baked: Lighter, less mess, and can still be satisfyingly crunchy when you preheat the pan, use a little oil, and flip once for even browning.
Fried: Classic fish-stick crunch with faster browning and a shattering crust. The key is steady oil temperature and a proper drain on a rack so steam does not soften the coating.
About the crunch
The crunch comes from three things working together: (1) dry fish sticks that take flour evenly, (2) a press into the breadcrumbs so they cling, and (3) high heat plus airflow on a rack so the crust stays crisp. It is the same idea as keeping fried donuts from going soggy, just in a savory direction.
For breadcrumbs, panko is my favorite for that extra-craggy bite, while finer crumbs brown a little faster and give you a tighter crust. Either way, you are aiming for a deep golden coating and fish that turns opaque and flakes easily.
If you want the simplest shopping list, stick with a mild, firm white fish like cod, haddock, pollock, or tilapia. Frozen works great too, just thaw completely and blot it really well before you start breading.
Why this recipe works
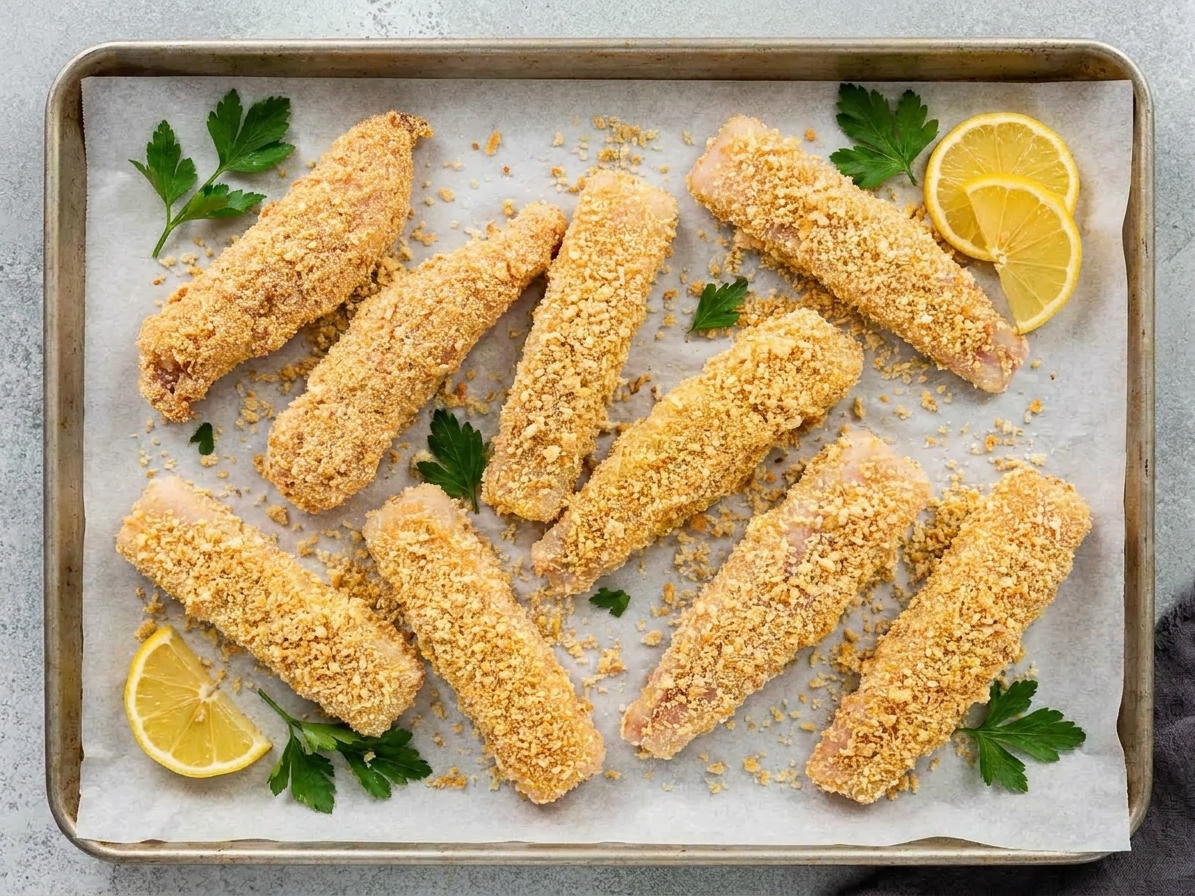
- Stick size cooks evenly: Cutting the fish into similar 1 inch by 4 inch fingers helps the coating brown at the same moment the fish turns opaque and flaky.
- Classic breading station: Flour helps the egg stick, egg helps the crumbs stick, and the crumbs create a protective shell that keeps the fish juicy.
- High heat plus a real drain: Whether you bake or fry, you want strong heat for quick crisping, then you want airflow on a rack so the crust stays crunchy.
- Seasoned at every stage: A little salt in the flour and the crumbs means the coating tastes good, not just the fish.
Ingredient notes
Best fish for fish sticks
Look for a mild, firm white fish: cod, haddock, pollock, or tilapia all work well. The main thing is thickness and freshness. Avoid very thin fillets if you can, since they overcook quickly.
Panko vs regular breadcrumbs
Panko gives the crunchiest, most craggy exterior. Regular fine breadcrumbs work too, but the crust will be a little tighter and less airy.
Egg and flour matter
If you have ever had breading slide off in sheets, it is usually because the fish was wet, or the flour step was skipped. Flour is the glue primer.
Oil
For frying, choose a neutral high-heat oil like canola, vegetable, or peanut. For baking, a little oil on the pan and a light spray or drizzle on top helps browning.
Equipment you will need
- Cutting board and sharp knife
- 3 shallow bowls or pie plates for the breading station
- Sheet pan (for baking option)
- Wire rack that fits inside a sheet pan (for draining and also great for baking)
- Large heavy skillet or Dutch oven (for frying option)
- Instant-read thermometer (helpful for checking oil temperature and doneness)
- Spider strainer or tongs
Pro tips
- Pat the fish dry like you mean it: Use paper towels and press. Dry fish equals crisp coating.
- Use one hand for dry, one hand for wet: It keeps the breading station from turning into paste on your fingers.
- Press crumbs on firmly: After coating, gently press the breadcrumbs onto each stick so they adhere through cooking.
- Let them sit 5 to 10 minutes before cooking: A short rest helps the breading hydrate and cling better.
- Drain on a rack, not paper towels: Paper towels trap steam underneath. A rack keeps air moving so the crust stays crisp.
- Salt right after frying: If you fry, a quick sprinkle while hot helps the salt stick and seasons the crust evenly.
Substitutes that work
- Gluten-free: Use a 1:1 gluten-free flour blend for dredging and gluten-free panko or crushed rice cereal for the coating.
- No eggs: Use mayonnaise thinned with a spoonful of water, or plain yogurt. You just need something sticky between flour and crumbs.
- No panko: Use regular breadcrumbs, crushed cornflakes, or crushed buttery crackers for a more snacky crust.
- Dairy-free dipping sauce: Swap mayo for a dairy-free mayonnaise, or do a quick mix of ketchup plus a squeeze of lemon.
Variations
- Lemon-pepper fish sticks: Add lemon zest and cracked black pepper to the breadcrumb mixture.
- Parmesan-herb: Stir grated Parmesan and dried oregano or parsley into the crumbs.
- Spicy: Add cayenne to the flour and a little hot sauce to the egg.
- Extra crunchy: Double-dip by going crumbs, back to egg, back to crumbs for a thicker crust.
Serving ideas
- Classic: fish sticks with oven fries or roasted potato wedges and a pile of crunchy slaw
- Weeknight bowl: fish sticks over rice with cucumbers, shredded cabbage, and extra sauce
- Wrap it up: tuck into warm tortillas with lettuce and a squeeze of lime
- Kid and adult plate: serve with peas or broccoli, plus a second dip like ketchup or sweet chili sauce
Storage and reheating
Refrigerator
Store cooled fish sticks in an airtight container for up to 2 days. For best texture, lay them in a single layer or separate layers with parchment.
Freezer
You can freeze cooked fish sticks, then reheat straight from frozen. Freeze in a single layer on a tray until firm, then transfer to a freezer bag for up to 2 months.
Reheating for crispness
Reheat on a wire rack set on a sheet pan at 425°F until hot and crisp. An air fryer also works beautifully. Avoid the microwave if crunch is the goal.
Common mistakes
- Cutting uneven sticks: Thin pieces overcook before the coating browns. Aim for consistent thickness.
- Skipping the dry-off: Wet fish makes the flour gummy and the breading patchy.
- Oil not hot enough (frying): The coating absorbs oil and turns heavy. Keep oil around 350°F and cook in batches.
- Crowding the pan: Crowding drops the temperature and creates steam, both enemies of crunch.
- Draining on paper towels: It sounds right, but it softens the crust. Use a rack.
FAQ
Can I bake fish sticks instead of frying?
Yes. Baking is a great option. Use a hot oven and some oil, and bake on a rack or preheated pan so the bottom crisps instead of steaming.
How do I know when fish sticks are done?
The coating should be deep golden and the fish should be opaque and flake easily. If you use a thermometer, aim for 145°F in the thickest stick.
What is the best breadcrumb for extra crunch?
Panko is my go-to for the crunchiest texture. Crushed cornflakes are also very crunchy and kid-approved.
Why is my breading falling off?
Usually the fish was too wet, the flour step was skipped, or the coating was not pressed on firmly. Also, flipping too early can knock it loose. Let it set for a minute or two before turning.
Can I prep them ahead?
You can bread the fish sticks and refrigerate them on a tray for a few hours before cooking. Keep them uncovered or lightly tented so the coating stays dry.
The recipe
Homemade Fish Sticks
Crispy, real-deal fish sticks made from white fish fingers with a seasoned breadcrumb coating. Choose baked or fried, then serve with a quick tangy dipping sauce.
- Prep
- 20 minutes
- Cook
- 12 minutes
- Total
- 32 minutes
- Yield
- 4 servings
Ingredients
- 1 1/2 pounds cod, haddock, pollock, or tilapia fillets
- 1 teaspoon kosher salt, divided, plus more to taste
- 1/2 teaspoon black pepper, divided
- 1/2 cup all-purpose flour
- 2 large eggs
- 1 tablespoon Dijon mustard (optional, for extra flavor)
- 1 1/2 cups panko breadcrumbs
- 1 teaspoon paprika
- 1/2 teaspoon garlic powder
- 2 tablespoons neutral oil (for baking option), plus more as needed
- Neutral oil for frying (for frying option), enough for 1/2 inch depth in pan
- Simple dipping sauce
- 1/2 cup mayonnaise
- 2 tablespoons ketchup
- 1 tablespoon dill pickle relish or finely chopped pickles
- 1 teaspoon lemon juice, plus more to taste
- 1/4 teaspoon garlic powder
- Pinch of salt and black pepper
Instructions
- Cut the fish into sticks: Pat fish very dry with paper towels. Cut into sticks about 1 inch wide and 4 inches long, aiming for even thickness. Sprinkle with 1/2 teaspoon salt and 1/4 teaspoon pepper.
- Set up a breading station: Place flour in a shallow bowl and season with 1/4 teaspoon salt and remaining 1/4 teaspoon pepper. In a second bowl, beat eggs with Dijon (if using). In a third bowl, mix panko, paprika, garlic powder, and remaining 1/4 teaspoon salt.
- Bread the fish sticks: Working one at a time, coat each fish stick in flour and shake off excess. Dip into egg, letting extra drip off. Press firmly into the panko mixture to coat all sides. Place on a rack set over a sheet pan. Let rest 5 to 10 minutes while you heat the oven or oil.
- Make the dipping sauce: In a small bowl, stir together mayonnaise, ketchup, relish, lemon juice, garlic powder, and a pinch of salt and pepper. Taste and adjust with more lemon or salt if needed. Refrigerate until serving.
- To bake (crisp and easy): Heat oven to 450°F. Add 2 tablespoons neutral oil to a sheet pan and place it in the oven for 5 minutes to heat. Carefully arrange fish sticks on the hot pan, leaving space between pieces. Bake 10 to 14 minutes total, flipping once halfway through, until deeply golden and the fish flakes easily or reaches 145°F in the thickest stick.
- To fry (classic crunch): In a heavy skillet or Dutch oven, heat 1/2 inch neutral oil to 350°F. Fry in batches, 2 to 3 minutes per side, until golden brown and the fish is opaque and flakes easily or reaches 145°F. Transfer to a wire rack set over a sheet pan. Sprinkle lightly with salt while hot.
- Serve: Serve immediately with dipping sauce. For maximum crunch, keep finished batches on the rack, not stacked.
Notes
Fish thickness tip: If your fillets are very thick on one end, you can split that portion horizontally so all sticks cook evenly.
Drain smart: A wire rack is the secret to keeping the crumb crunchy, for both baked and fried fish sticks.
Seasoning flexibility: Swap paprika for Old Bay style seasoning, or add a pinch of cayenne if you like heat.