
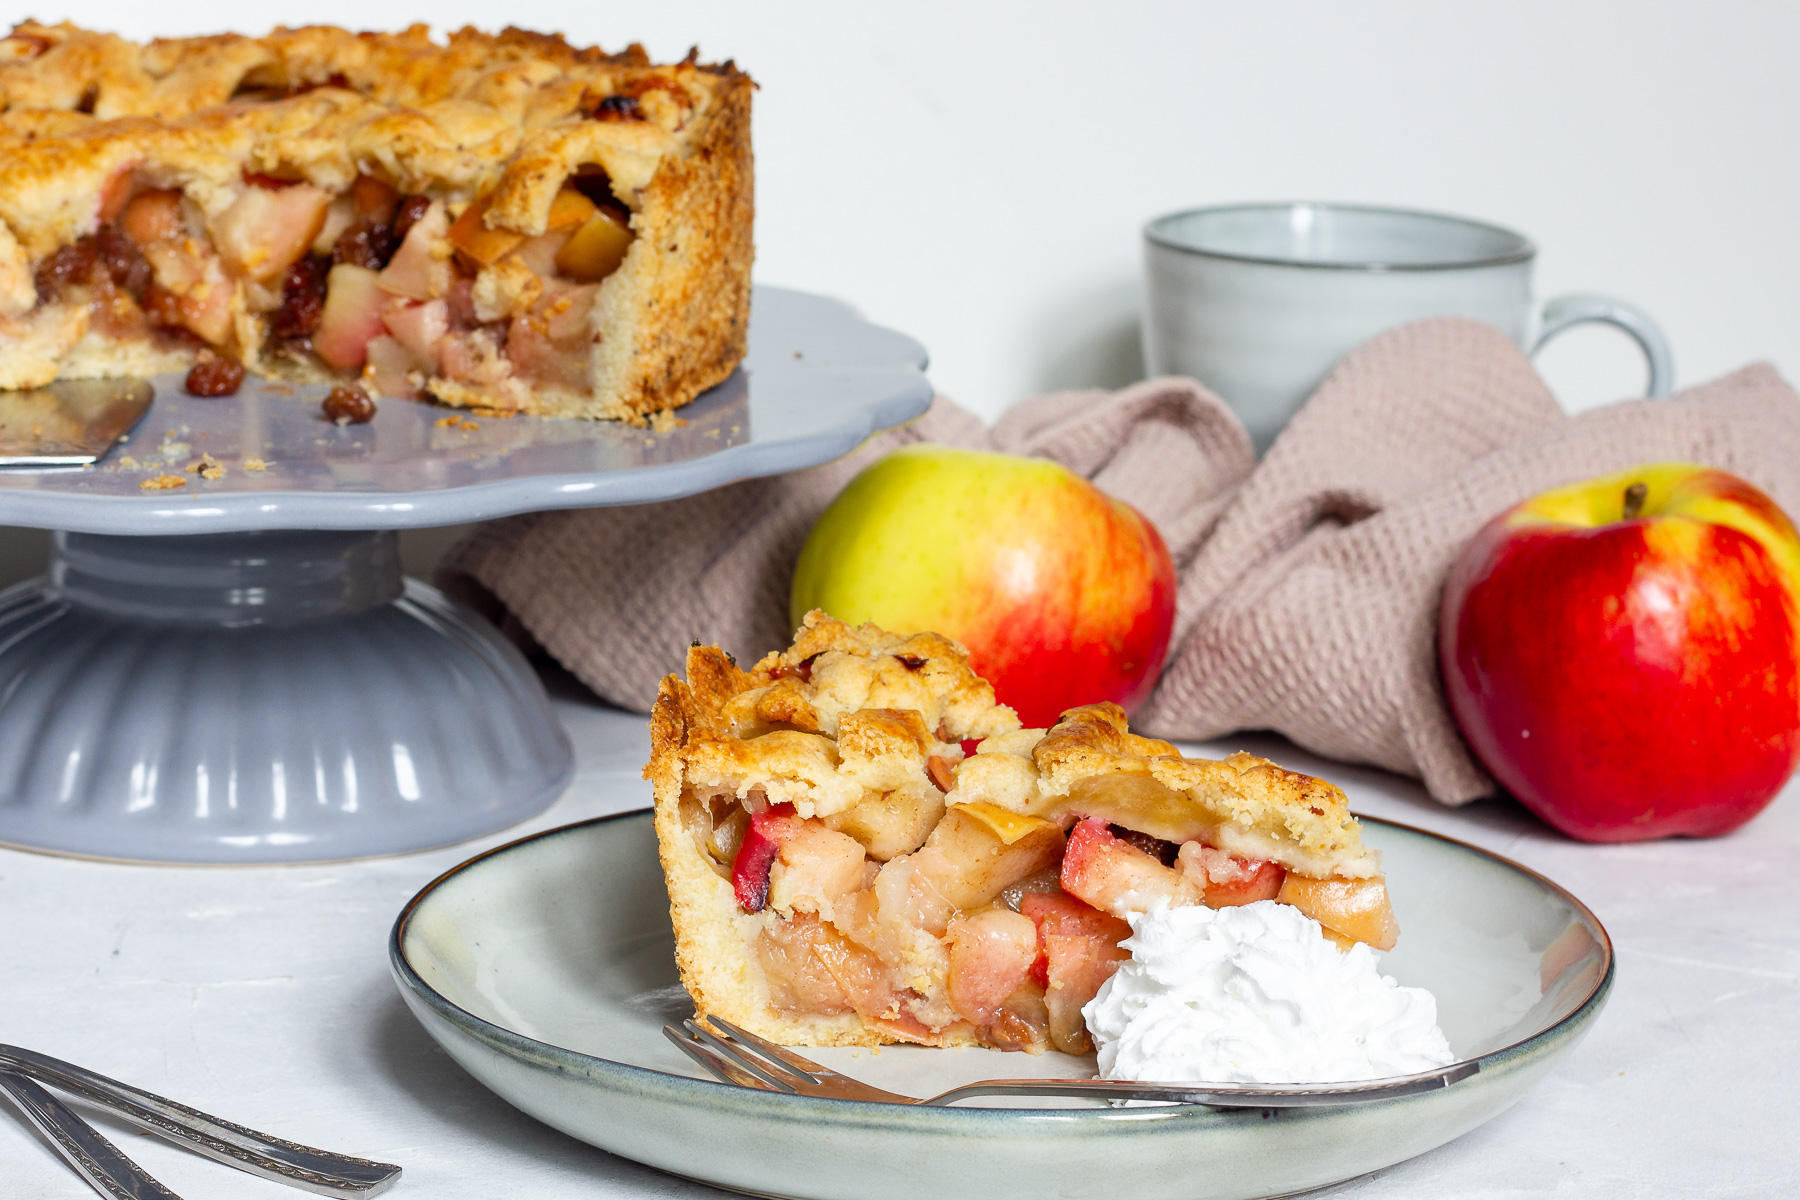
The first time I made a Dutch apple pie as a bakery manager, I thought the crumb topping would be the easy part. Spoiler: it is easy, but it is also where most pies go a little sideways. Either the crumb browns before the apples are tender, or the apples turn soft and soupy while the top stays pale and sandy.
This version is my weeknight-reality answer to that problem. It is a true Dutch apple pie: a bottom crust only, a generous layer of sliced baking apples tossed with warm spice, and a thick, buttery crumb blanket on top. The goal is specific: bubbling edges, apples that are tender but still have structure, and a crumb topping that goes deep golden without tasting scorched.

If you are nervous about pie, I want you to know this is one of the most forgiving styles to bake at home. No top crust to fuss with, no lattice anxiety, and the crumble actually protects the filling as it bakes.
What to expect when it is right: the kitchen smells like cinnamon and butter, the topping is crisp and craggy, and the filling sets up into sliceable layers once it has fully cooled. The key tell is not just color. It is seeing the filling actively bubble in multiple spots, and then giving the pie enough time on the counter to finish setting before you cut in.
Why this recipe works
- Sliced baking apples keep their shape. Using firm, high-acid apples and slicing instead of dicing helps the filling turn tender and juicy without collapsing into mush.
- A real thickener prevents the “soupy pie” situation. The starch binds apple juices as they release, so you get glossy filling that sets as it cools.
- The crumb topping acts like insulation. A thick streusel layer slows moisture loss from the apples, which helps them stay juicy even as the top browns.
- Two-stage browning gives you control. Starting hot sets the crust and kickstarts bubbling. If the crumb gets too dark before the apples are ready, a simple foil tent lets the filling finish without burning the topping.
- Baking to steady bubbling is the doneness cue that matters. Consistent bubbling around the edges for several minutes tells you the filling is hot enough for the thickener to properly activate and set up as it cools.
Ingredient notes
Apples
Choose apples that are firm and bake-friendly. I love a mix because it tastes more like “real apple” and less one-note. Good options include Granny Smith (tart and sturdy), Braeburn, Pink Lady, Jonagold, and Honeycrisp. Apple texture can vary by freshness and storage, so if you want the most reliable “slices that stay slices” result, lean heavier on Granny Smith plus Braeburn or Pink Lady.
Thickener
Cornstarch gives a clear, glossy set and works beautifully in apple pie. Tapioca starch also works and can be slightly silkier. All-purpose flour can thicken in a pinch, but it can look a little cloudy and usually needs a touch more.
Spice
Cinnamon is the backbone. A small amount of nutmeg or allspice adds depth without screaming “spice rack.” If your apples are very sweet, a pinch more salt helps everything taste brighter.
Crumb topping
The best crumb is equal parts crisp and tender. Use cold butter so you get chunky crumbs, not paste. Brown sugar brings caramel notes and better color, while a little granulated sugar keeps the texture snappy.
Bottom crust
You can use your favorite homemade pie dough or a good-quality store-bought crust. The biggest win here is par-chilling the shaped crust so the edges hold their shape in the oven.
Equipment you will need
- 9-inch pie plate (glass or metal both work)
- Rimmed baking sheet to catch drips and keep your oven clean
- Mixing bowls (one for apples, one for crumb)
- Vegetable peeler
- Chef’s knife for slicing apples
- Measuring cups and spoons
- Pastry cutter or your fingers for making the crumb
- Foil for tenting if the topping browns too fast
Pro tips
- Slice evenly for even bake. Aim for slices about 1/4-inch thick so they cook through at the same pace.
- Pack the apples. Apples shrink a lot. Mound them slightly higher than the rim so you do not end up with a sunken pie.
- Chill the crust before filling. A cold crust holds its shape better and is less likely to slump.
- Start hot, finish steady. A higher initial oven temp helps set the crust and get the filling moving. Then you can reduce to finish tenderizing the apples.
- Use the foil tent like a dial, not a rescue. If the crumb is getting as dark as you like but the filling is not bubbling yet, tent loosely with foil and keep baking.
- Look for sustained bubbling. You want consistent, active bubbling around the perimeter for several minutes, not one lonely bubble. This is your sign the juices are hot enough for the thickener to do its job.
- Cool completely for clean slices. Warm pie is delicious, but it slices messy. Let it cool until the filling sets, then rewarm slices if you want.
Substitutes that work
- Store-bought crust: Absolutely fine here. Let it come to cool room temp so it is pliable, then fit it into the plate and chill well.
- Thickener swap: Use tapioca starch in place of cornstarch in equal amounts. If using flour, increase the amount slightly and expect a more rustic set.
- Sugar: You can use all brown sugar in the crumb for deeper flavor. In the filling, swap some granulated sugar for brown for a warmer, caramel note.
- Butter: Use unsalted if possible so you control salt. If using salted butter, reduce added salt a touch.
- Spice: Apple pie spice works if that is what you have. If it is older and smells dusty, lean on cinnamon and add a small pinch of fresh nutmeg instead.
Variations
- Caramel Dutch apple pie: Drizzle cooled pie with caramel sauce, or add a small layer of thick caramel under the apples so it does not flood the filling.
- Nutty crumb topping: Add chopped pecans or walnuts to the crumb for crunch. Toasty, cozy, and very Sunday-dinner energy.
- Cheddar crust: If you love sweet-salty desserts, add finely grated sharp cheddar to the bottom crust dough, then proceed as usual.
- Maple twist: Replace a portion of the sugar in the filling with maple syrup and reduce any other liquid additions. Maple plus tart apples is magic.
- Extra citrus: Add lemon zest to the apples for brightness, especially if your apples are on the sweet side.
Serving ideas
- Classic: Warm slice with vanilla ice cream. Let the ice cream melt into the crumb like a little sauce.
- Cozy: Dollop of lightly sweetened whipped cream with a pinch of cinnamon.
- Brunch-style: Serve at room temp with coffee and a spoonful of plain Greek yogurt on the side.
- Holiday: Add a drizzle of salted caramel and a few toasted nuts.
Storage and reheating
Room temperature
Cover and keep at room temperature for up to 2 days if your kitchen is cool. The crumb stays crispest this way.
Refrigerator
For longer storage, cover and refrigerate up to 4 days. The topping will soften slightly, but the flavor is still wonderful.
Freezer
You can freeze baked pie. Cool completely, wrap well, and freeze up to 2 months. Thaw overnight in the refrigerator.
Reheating
To re-crisp the crumb, warm slices in a 325°F oven until heated through. A toaster oven does a surprisingly great job for single slices.
Common mistakes
- Pulling the pie before it bubbles. If the filling never gets hot enough to bubble, the thickener cannot fully activate. The result is runny slices.
- Using all soft apples. Softer varieties can break down quickly, leaving you with a slumpy filling and extra liquid.
- Overworking the crumb. If the butter melts into the flour and sugar completely, you get a sandy layer instead of chunky crumbs.
- Skipping the baking sheet. Dutch apple pie loves to bubble over. Put the pie on a rimmed sheet to avoid burnt sugar on the oven floor.
- Slicing too soon. The filling needs time to set. If you slice hot, it will look watery even if you baked it correctly.
FAQ
Do I need to pre-bake the bottom crust?
Not usually, but you do want the crust cold when it goes in the oven. If you struggle with soggy bottoms, you can partially bake the crust until it just starts to look dry, then cool and fill. Baking the pie on a preheated sheet pan also helps.
How do I keep the crumb topping from burning?
Watch color, not the clock. Once it is the golden brown you like, tent the pie loosely with foil and keep baking until the filling bubbles at the edge.
Why is my Dutch apple pie watery?
Common culprits are not enough thickener, not baking long enough to bubble, or slicing while the pie is still hot. Apples also vary in juiciness, so measuring apples by weight can be more consistent than counting “6 apples.”
Should I cook the apples first?
You can, but you do not have to. Precooking reduces shrinkage and helps you pack more apples in, but it is an extra step. This recipe is designed to work well with raw sliced apples.
What is the difference between Dutch apple pie and apple crisp?
Dutch apple pie has a bottom crust and a crumb topping. Apple crisp is typically baked without a crust, more like a fruit bake with streusel on top.
The recipe
Dutch Apple Pie
Bottom-crust Dutch apple pie with tender cinnamon-spiced apples and a thick buttery crumb topping, baked until the filling bubbles at the edges and the top turns deep golden.
- Prep
- 30 minutes
- Cook
- 60 to 75 minutes
- Total
- 3 hours 30 minutes
- Yield
- 1 (9-inch) pie
Ingredients
- 1 (9-inch) unbaked pie crust (homemade or store-bought)
- 3 lb baking apples (about 6 to 8 medium), peeled, cored, and sliced 1/4-inch thick
- 3/4 cup granulated sugar
- 2 tbsp fresh lemon juice
- 3 tbsp cornstarch
- 1 1/2 tsp ground cinnamon
- 1/4 tsp ground nutmeg (optional)
- 1/2 tsp fine salt
- 1 tsp vanilla extract
- Crumb topping: 1 cup all-purpose flour
- Crumb topping: 3/4 cup packed light brown sugar
- Crumb topping: 1/4 cup granulated sugar
- Crumb topping: 1/2 tsp ground cinnamon
- Crumb topping: 1/2 tsp fine salt
- Crumb topping: 10 tbsp unsalted butter, cold and cut into small cubes
Instructions
- Prep the oven and pan. Place a rack in the lower third of the oven. Set a rimmed baking sheet on the rack to preheat. Heat the oven to 425°F.
- Fit and chill the crust. Press the pie crust into a 9-inch pie plate, trim and crimp the edge as desired, then refrigerate while you prepare the filling and topping.
- Make the crumb topping. In a medium bowl, whisk together the flour, brown sugar, granulated sugar, cinnamon, and salt. Add the cold cubed butter and cut it in with a pastry cutter or rub with your fingertips until you have a mix of sandy bits and pea-size to walnut-size clumps. Refrigerate the topping while you mix the apples.
- Mix the apple filling. In a large bowl, toss the sliced apples with granulated sugar, lemon juice, cornstarch, cinnamon, nutmeg (if using), salt, and vanilla until the apples are evenly coated.
- Assemble. Spoon the apples into the chilled crust, packing them in firmly and mounding slightly in the center. Sprinkle the crumb topping evenly over the apples, breaking up any very large chunks so the layer looks even but still craggy.
- Bake to set the crust. Place the pie on the preheated rimmed baking sheet. Bake at 425°F for 15 minutes.
- Lower the heat and finish baking. Reduce the oven temperature to 375°F and continue baking until the topping is deep golden and the filling is actively bubbling at the edges, 45 to 60 minutes more. If the crumb topping reaches your preferred color before the filling is bubbling, loosely tent the top with foil and keep baking.
- Cool completely. Transfer the pie to a wire rack and cool until fully set, about 2 to 3 hours. Slice and serve. For warm slices, rewarm in a 325°F oven for 10 to 15 minutes.
Notes
Apple choice: For the best texture, use at least half firm-tart apples like Granny Smith and the rest a crisp sweet-tart variety like Honeycrisp or Pink Lady.
Doneness cue: Color matters, but bubbling matters more. Look for consistent bubbling around the perimeter of the pie, not just one or two spots.
Foil tent tip: A loose tent prevents burning without trapping too much steam. Do not press foil directly onto the crumb.
Make-ahead: The crumb topping can be made up to 3 days ahead and kept refrigerated. The pie crust can be fitted to the plate and chilled up to 1 day ahead.