
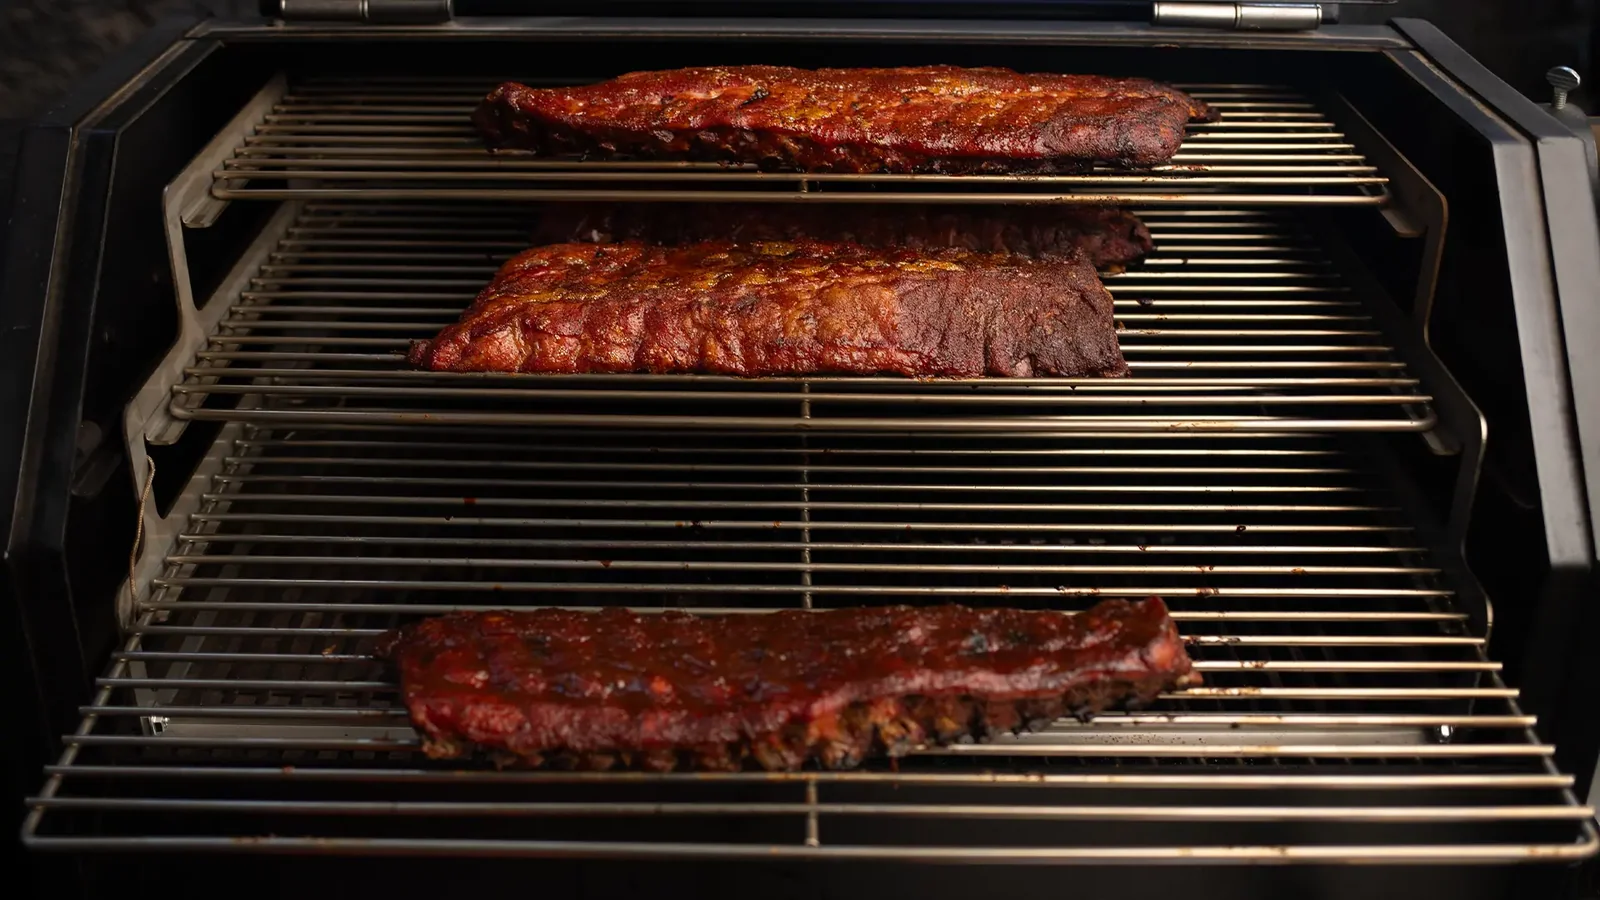
Baby back ribs used to feel like “special occasion food” to me, the kind of thing you only tackled if you had a smoker, a full Saturday, and the confidence of someone who owns multiple thermometers. Then I managed a bakery, started writing recipes, and realized the same truth over and over: most impressive meals are really just a handful of small, calm steps done in the right order.
This is that kind of ribs recipe. We do three things that matter: we remove the membrane so the ribs actually turn tender (instead of weirdly chewy), we give them a dry rub that tastes like you meant it, and we cook them covered and low until the rack bends easily. Sauce comes late, on purpose. That is how you get sticky, glossy ribs without that heartbreaking burnt sugar layer.

Oven or grill, your choice
I’m giving you two paths because weeknights are real. The oven method is steady and forgiving and basically guarantees tenderness. The grill method gives you that outdoor flavor, but we still keep the ribs covered for most of the cook so they don’t dry out.
- Oven: Covered bake until bendy, then uncover and glaze briefly at a higher heat.
- Grill: Indirect heat, covered, until bendy, then finish over direct heat quickly to set the glaze.
How to know they are done
Forget chasing a single “perfect” time. Racks vary, and so do ovens and grills. Instead, look for a few doneness cues:
- The bend test: Pick up the rack with tongs about one third of the way in. If it bends easily into a deep curve and the surface cracks slightly, you are in the sweet spot.
- Bone show: The meat has pulled back from the ends of the bones by about 1/4 to 1/2 inch.
- Feel: A toothpick slides into the meat between bones with little resistance.
If you want a number, ribs are typically tender around 195°F to 203°F internal, measured in the thickest meaty area between bones, not touching bone.
The glaze pass that will not burn
Most bottled BBQ sauces contain sugar or molasses, which can scorch fast. My rule: cook the ribs first, sauce second. Then use a short, controlled glaze step.
- Oven: Finish at a higher heat just long enough to tighten the sauce, usually 8 to 12 minutes.
- Grill: Glaze over direct heat for 1 to 3 minutes per side, lid open, watching closely.
If your sauce is very sweet, thin it with a splash of apple cider vinegar or water. That small tweak buys you time and keeps the glaze glossy instead of burnt.
Why this recipe works
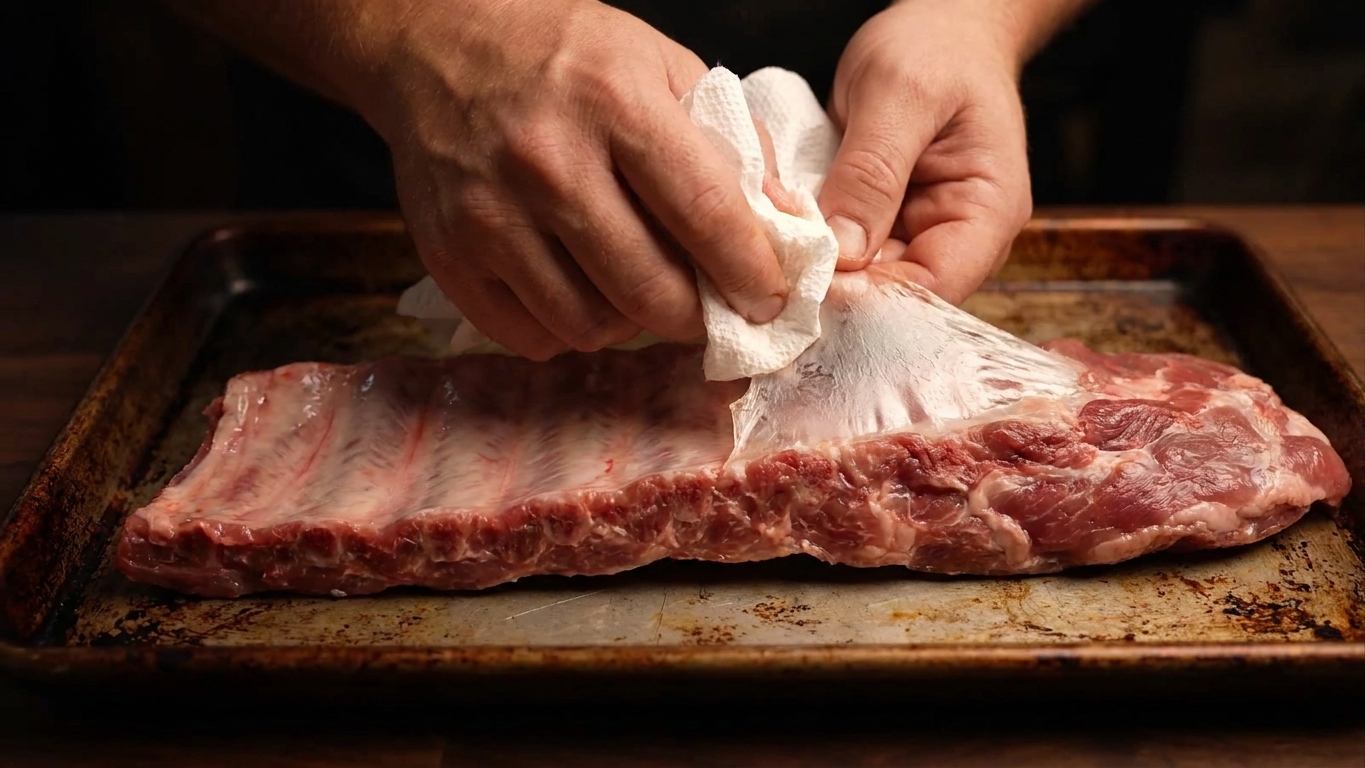
- Membrane removal: Taking off the silverskin on the bone side lets seasoning and heat do their job, and it eliminates that rubbery bite that can make ribs seem “tough” even when cooked a long time.
- Dry rub + time: Salt in the rub seasons deeply while the sugar and spices build a crust. Even a short rest while the oven heats makes a difference.
- Covered cook: Wrapping or covering traps moisture and keeps the surface from drying out before the connective tissue has time to soften.
- Bend test doneness: Ribs are about tenderness, not just temperature. The bend cue helps you land on that juicy, pull-apart texture.
- Late sauce: Sauce goes on at the end so it caramelizes without burning, giving you a sticky glaze instead of bitter char.
Ingredient notes
- Pork baby back ribs: Look for racks with even thickness across the length. Extra meaty is nice, but avoid racks with huge fat caps.
- Kosher salt: If you use fine table salt, reduce the amount. Fine salt measures denser and can make the rub too salty.
- Brown sugar: Helps with browning and that classic rib crust. If you are worried about burning, remember we do the sweet glaze late and briefly.
- Paprika: Smoked paprika adds barbecue vibes even if you are baking indoors. Regular paprika works too, just milder.
- Garlic powder and onion powder: These give the rub that savory backbone that tastes “grilled” even in the oven.
- BBQ sauce: Use your favorite. If it is very thick or very sweet, thin it slightly with vinegar or water for a shinier glaze that is less likely to scorch.
- Apple cider vinegar: Optional, but a small splash in the wrap or on the grill pan adds gentle tang and helps keep the meat moist.
Equipment you will need
- Rimmed baking sheet or roasting pan
- Heavy-duty aluminum foil, or a large baking dish with a tight lid
- Paper towels (for gripping the membrane)
- Small bowl for the rub
- Basting brush (for sauce)
- Tongs
- Instant-read thermometer (optional but helpful)
- Grill with lid (if using the grill method)
Pro tips
- Membrane trick: Slide a butter knife under the membrane over a middle bone, lift, then grab it with a paper towel and pull. If it tears, start again where it’s loose.
- Season generously: Ribs are thick and can take more rub than you think. Press the rub on instead of rubbing it off.
- Two-zone grill setup: Keep one side of the grill off or lower. Cook ribs on the cool side with the lid closed so they roast, not scorch.
- Watch the glaze step: Glazing is fast. Have your brush and sauce ready before you uncover the ribs.
- Rest before slicing: Ten minutes is enough to keep juices in the meat and makes cleaner cuts.
Substitutes that work
- No brown sugar: Use white sugar plus 1 teaspoon molasses per 1/4 cup sugar, or use coconut sugar. If you skip sugar entirely, the bark will be less caramelized but still tasty.
- No smoked paprika: Use sweet paprika and add a pinch of chipotle powder or cumin for depth.
- No BBQ sauce: Brush with a mix of ketchup, a little brown sugar, vinegar, and Worcestershire. Keep it thin enough to brush.
- Less spicy: Skip cayenne or chipotle. Add a little extra black pepper instead.
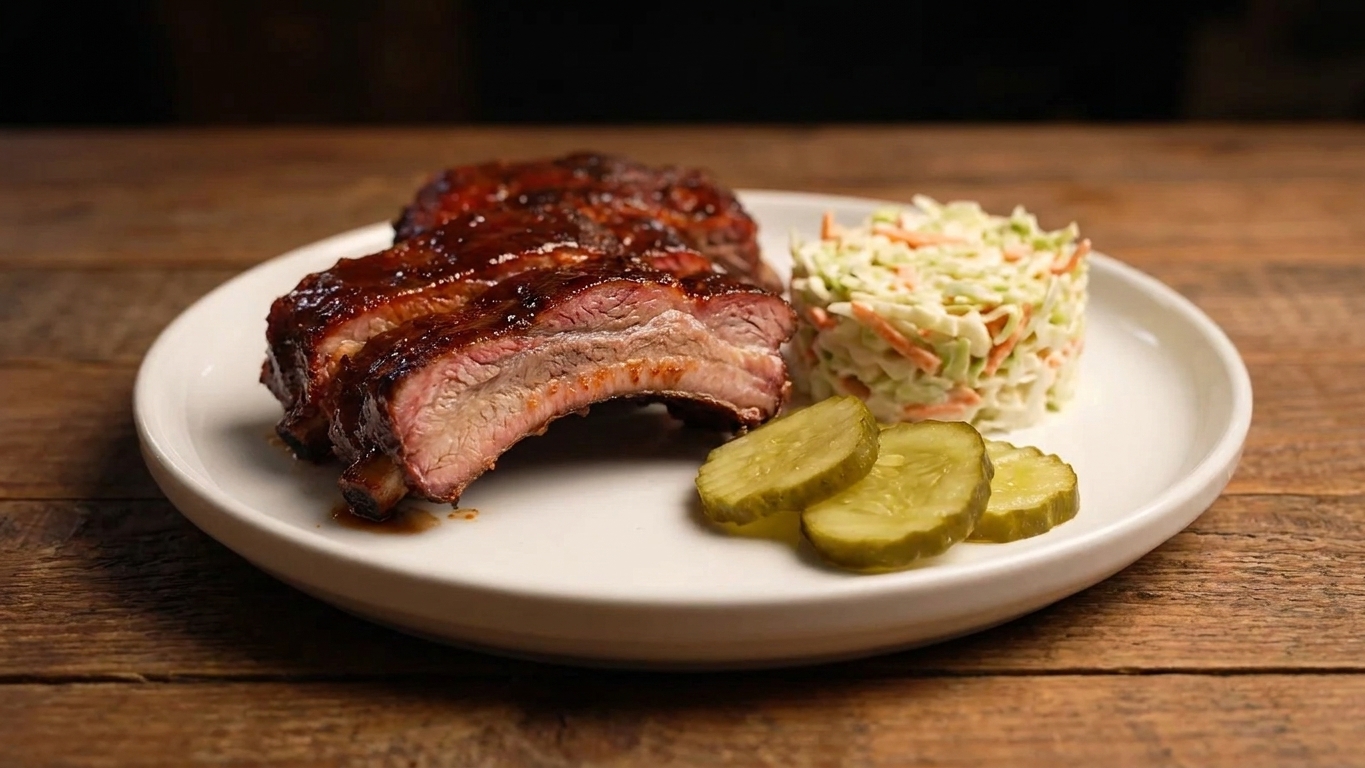
- More tangy: Add more apple cider vinegar to the sauce, or serve with pickle slices and slaw to balance richness.
Variations
- Honey-garlic glaze: Swap BBQ sauce for a mix of honey, soy sauce, garlic, and a splash of vinegar. Apply only at the very end.
- Dry ribs: Skip sauce entirely. Finish uncovered for a few minutes to firm the crust, then serve with sauce on the side.
- Spicy-sweet: Add chipotle powder to the rub and stir hot sauce into the BBQ sauce right before glazing.
- Mustard binder: Lightly coat ribs with yellow mustard before the rub. It won’t taste “mustardy” but helps the rub cling.
Serving ideas
- Classic coleslaw and corn on the cob
- Roasted potatoes or potato salad
- Pickles, white onion slices, and extra sauce on the side
- Simple green salad with a sharp vinaigrette
- Mac and cheese when you want full comfort-mode
Storage and reheating
- Refrigerate: Cool ribs, then wrap tightly or store in an airtight container for up to 4 days.
- Freeze: Wrap portions well and freeze up to 2 months for best texture. Thaw overnight in the fridge.
- Reheat (best): Place ribs in a baking dish with a splash of water or apple cider vinegar, cover tightly with foil, and warm at 300°F until hot throughout.
- Reheat (quick): Microwave covered at medium power in short bursts. It works, but the texture is softer.
- Save the bones: Any meaty rib bits are great chopped into fried rice, tacos, or a quick weeknight ramen upgrade.
Common mistakes
- Leaving the membrane on: It blocks seasoning and turns chewy. If there is one “extra” step worth doing, it’s this.
- Saucing too early: BBQ sauce burns faster than you think. Cook first, glaze last.
- Cooking uncovered the whole time: Ribs can dry out before they get tender. Covered cooking keeps them juicy.
- Relying only on time: Use the bend test and bone pullback cues. Racks are not all the same size.
- Slicing right away: Give the ribs a short rest so juices stay in the meat, not on the cutting board.
FAQ
Do I have to remove the membrane?
I really recommend it. Some racks are sold “membrane removed,” but if you see a thin, shiny layer on the bone side, take it off. Your ribs will be more tender and easier to eat.
What temperature should I bake baby back ribs?
Low and slow is your friend. A covered bake around 275°F to 300°F is forgiving. Then finish uncovered at a higher heat briefly to set the glaze.
How long do baby back ribs take?
Plan on about 2 1/2 to 3 1/2 hours total cook time for a typical rack, depending on size and your oven or grill temperature. Start checking for the bend test around the 2 1/2 hour mark.
Can I grill them without drying them out?
Yes, but use indirect heat with the lid closed for most of the cook. Treat the grill like an outdoor oven, then do a short direct-heat glaze finish.
Why did my sauce burn?
Most likely the heat was too high for too long once the sauce was on. Apply sauce late and keep the glaze step short, especially with sweet sauces.
The recipe
Baby Back Ribs
Tender baby back ribs seasoned with a smoky-sweet dry rub, cooked covered until bendy and juicy, then finished with a quick BBQ glaze that caramelizes without burning.
- Prep
- 20 minutes
- Cook
- 3 hours 15 minutes
- Total
- 3 hours 45 minutes
- Yield
- 4 to 6
Ingredients
- 2 racks pork baby back ribs (about 2 to 2 1/2 lb each)
- 2 tsp kosher salt
- 2 tbsp packed brown sugar
- 2 tbsp paprika (smoked or sweet)
- 2 tsp garlic powder
- 2 tsp onion powder
- 1 tsp freshly ground black pepper
- 1/2 tsp cayenne pepper (optional)
- 1 cup barbecue sauce, plus more for serving
- 1 to 2 tbsp apple cider vinegar or water (optional, to thin sauce or add moisture)
Instructions
- Heat the oven or prep the grill. Oven method: heat to 300°F and set a rack in the middle. Grill method: set up for two-zone cooking (one side medium, one side off) and preheat to about 300°F to 325°F with the lid closed.
- Remove the membrane. Flip ribs bone-side up. Slide a butter knife under the thin membrane over a middle bone to loosen it. Grab with a paper towel and pull it off in one sheet if possible. Discard.
- Mix the rub. In a small bowl, combine kosher salt, brown sugar, paprika, garlic powder, onion powder, black pepper, and cayenne (if using).
- Season the ribs. Pat ribs dry. Sprinkle rub evenly over both sides, pressing it on so it adheres.
- Cook covered until tender. Oven: Place each rack on a large sheet of heavy-duty foil. Add 1 tablespoon vinegar or water (optional) to each packet, then wrap tightly. Place packets on a rimmed baking sheet. Bake 2 1/2 to 3 hours. Grill: Place ribs on the cool, indirect side of the grill. Add a small foil pan of water on the hot side if you like. Close lid and cook 2 1/2 to 3 1/2 hours, maintaining 300°F to 325°F.
- Check doneness. Carefully open one packet or lift the grill lid. Use tongs to lift the rack about one third of the way in. The ribs are ready for glazing when they bend easily into a deep curve and the surface cracks slightly, and the meat has pulled back from bone ends by about 1/4 to 1/2 inch. If not tender yet, rewrap or re-cover and cook 20 to 30 minutes more, then check again.
- Prepare for glazing. Move ribs to a baking sheet (oven) or keep on the grill. If your BBQ sauce is very thick or sweet, stir in 1 to 2 tablespoons vinegar or water so it brushes on easily.
- Glaze without burning. Oven: Increase oven to 425°F. Brush ribs with a thin layer of sauce. Bake uncovered 8 to 12 minutes, just until the sauce looks set and glossy. For extra stickiness, brush on a second thin layer halfway through. Grill: Brush ribs with sauce. Move to direct heat and grill 1 to 3 minutes per side with the lid open, watching closely so the sugar does not scorch. Add a second thin coat after flipping if desired.
- Rest and slice. Rest ribs 10 minutes. Slice between bones and serve with extra sauce on the side.
Notes
Timing guide: Most baby back ribs take 2 1/2 to 3 1/2 hours to get tender at 300°F to 325°F. Start checking at 2 1/2 hours, then add 20 to 30 minute increments as needed.
Doneness cue: The bend test is the most reliable for home cooks. If you prefer using a thermometer, ribs are often tender around 195°F to 203°F in the thickest meaty area between bones.
Glaze tip: Sauce goes on at the end only. Keep the glaze pass short and use thin layers for the best sticky finish without burning.